Season 4: Evernight Isle turns
Last War: Survival into a light-and-darkness campaign on Sakura Isle. Your personal progression depends on Quartz production, the Optoelectronic Lab, Virus Resistance, Lighthouse power, and Electricians. At alliance level, Cities, Digging Strongholds, the Alliance Center, and Copper Wars determine seasonal ranking and rewards.
The fastest way to progress is to build Quartz production early, upgrade the Optoelectronic Lab whenever Virus Resistance or Brightness becomes a bottleneck, activate all four generators, and manage Lighthouse power instead of leaving maximum Brightness active constantly. Blood Night begins in Week 1 and occurs three times per day, while Copper War becomes the main alliance conflict from Week 4 onward.
★Quick Take
The core Season 4 loop is Stone → Quartz Workshops → Quartz → Optoelectronic Lab → Virus Resistance and higher Brightness. Keep your Lighthouse powered, unlock Electricians as soon as possible, and help your alliance capture Copper-producing Cities early enough for their hourly production to matter.
What Is Season 4: Evernight Isle?
Evernight Isle follows
Season 3 Golden Kingdom. Sakura Isle has been covered in darkness by the Oni Virus, making light management a central seasonal mechanic.
Season 4 replaces Season 3’s Curse Resistance economy with Virus Resistance, Quartz, Stone, Lighthouse power, Electricians, Copper, and Tactics Cards.
| Season 4 System |
Main Purpose |
| Stone |
Builds and upgrades Quartz Workshops and selected seasonal structures |
| Quartz |
Upgrades the Optoelectronic Lab |
| Copper |
Drives Alliance Center progression, alliance ranking, and Copper War |
| Magatama |
Seasonal currency for the Magatama Shop |
| Optoelectronic Lab |
Raises Virus Resistance and unlocks higher Lighthouse Brightness |
| Quartz Workshops |
Produce Quartz continuously |
| Lighthouse |
Stores power and illuminates your base and nearby area |
| Electricians |
Operate generators, accompany squads, support allies, and activate seasonal objectives |
| Alliance Center |
Produces Copper, supplies power, and unlocks alliance resource buildings |
| Blood Night Descend |
Creates recurring high-risk periods with stronger enemies and increased power demand |
| Sarah Promotion |
Allows eligible players to promote Sarah from SSR to UR |
| Exclusive Weapons |
Add weapons for Lucius, Adam, and Williams |
Season 4 Week-by-Week Timeline
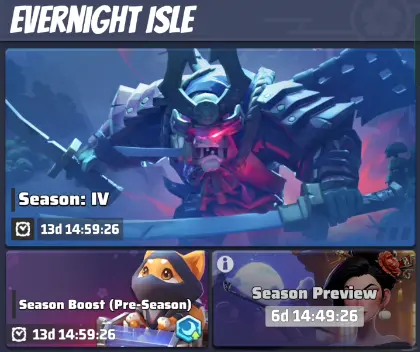
Season 4 is preceded by a two-week Pre-Season and then runs through eight active season weeks. Important systems unlock gradually, so planning for the next week is more efficient than reacting after an event begins.
| Period |
Main Unlocks and Priorities |
| Pre-Season |
Grouping, season preview, rules, rewards, and preparation |
| Week 1 |
Optoelectronic Lab, Quartz Workshops, Lighthouse, Alliance Center, Tactics Cards, Blood Night Stage 1, level 1-2 Cities, Lucius weapon |
| Week 2 |
Ryōtei Restaurant, Divine Tree, Blood Night Hunter, Wandering Oniwagons, level 3-4 Cities |
| Week 3 |
Sarah UR promotion, Trade Posts, Blood Night Stage 3, level 5-6 Cities, Adam weapon, faction selection |
| Week 4 |
Copper War begins, level 7 City/Capitol opens late in the week |
| Week 5 |
Copper War and Trade Post competition continue |
| Week 6 |
Copper War intensifies and Williams’s Exclusive Weapon arrives |
| Week 7 |
Copper War, Faction Duel, War’s Eve, and major Capitol preparation |
| Week 8 |
Holy Mountain/Blood Night Stage 4, settlement, final rankings, Capitol Conquest, and end-of-season conversion |
Use the countdowns in your Season interface as the final timing reference because server scheduling and later game adjustments can change individual event start times.
What to Prepare Before Season 4
The best preparation is a strong main formation plus enough flexibility to respond to seasonal resource bottlenecks.
- Join an active alliance with organized leadership.
- Save stamina for seasonal zombies, Doom Elites, Oni Generals, and other first-kill rewards.
- Save Hero Return Tickets if you plan to use S4 Legend Returns.
- Keep generic speedups for seasonal progression and normal account upgrades.
- Prepare Sarah and Universal Epic Shards if you intend to promote her.
- Decide whether Lucius, Adam, or Williams belongs to your long-term main squad before buying weapon materials.
- Keep teleports available for Alliance Center and hive movement.
- Improve Hospital and Emergency Center capacity before Copper War.
- Focus hero, gear, and research investment on one main formation.
If your alliance expects major relocation, review the
Advanced Teleporter guide before using premium teleport items.
Season mechanics do not replace normal battle development. The
Last War troop stats guide explains how March Size, troop tier, Morale, Attack, Defense, and HP continue to affect seasonal battles. Players working toward advanced troop progression can also review the
Unit X guide.
Best Season 4 Priorities
- Build Quartz production early. Workshop upgrades compound for the rest of the season.
- Upgrade the Optoelectronic Lab. It is the main permanent source of Season 4 Virus Resistance.
- Activate every generator. Each generator adds an Electrician and increases your power options.
- Manage Lighthouse Brightness. Use enough light for the current task instead of draining power unnecessarily.
- Participate in early territory captures. Cities and Strongholds produce resources every hour they are held.
- Prepare for Blood Night. It occurs every day and can empty Lighthouse power quickly.
- Protect alliance Copper. From Week 4, Copper War can directly reduce an alliance’s accumulated resource advantage.
- Keep hero spending focused. Sarah’s promotion and three Exclusive Weapons can consume large amounts of shards if pursued simultaneously.
Season 4 Resources Explained
Stone

Stone is primarily used to construct and upgrade Quartz Workshops and other seasonal structures.
Important Stone sources include:
- First-time seasonal zombie kills.
- First-time Doom Elite kills.
- The daily Doom Walker First Blood reward.
- Visitors outside your base.
- Season Quests and Season Goals.
- Battle Pass and Weekly Pass rewards.
- City and Digging Stronghold first-capture rewards.
- Digging Stronghold production.
- The Alliance Center Stone Warehouse after it unlocks.
Unlike some earlier seasons, seasonal resource tiles that appear after Doom Elite kills do not provide Stone or Quartz. Alliances therefore cannot funnel those resources to one designated player through seasonal resource farms.
Quartz

Quartz upgrades the Optoelectronic Lab, making it the resource that converts your Workshop economy into Virus Resistance and higher Lighthouse Brightness.
Quartz sources include:
- Quartz Workshop production.
- First-time seasonal zombie rewards.
- Season Quests and Season Goals.
- S4 Legend Returns.
- City first-capture rewards.
- Mini Maneki-neko.
- Magatama Shop rewards.
- Season passes and selected events.
Copper

Copper is the primary alliance ranking resource. It is generated by Cities and the Alliance Center and becomes the resource fought over during Copper War.
Copper affects:
- Alliance ranking.
- Alliance Center progression.
- Season reward tiers.
- Copper War attack and defense strategy.
- Late-season diplomacy and territory priorities.
Magatama

Magatama is spent in the Magatama Shop, whose inventory expands as additional weekly content unlocks.
Sources include Blood Night goals, Blood Night first kills, Oni Generals, Wandering Oniwagons, the Alliance Center Magatama Warehouse, and other Season 4 activities.
Because the shop remains available during Week 8, there is usually no reason to spend Magatama immediately without checking later inventory first.
Optoelectronic Lab and Virus Resistance
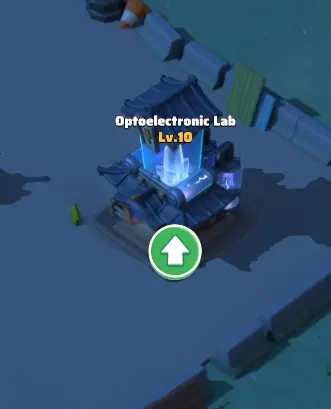
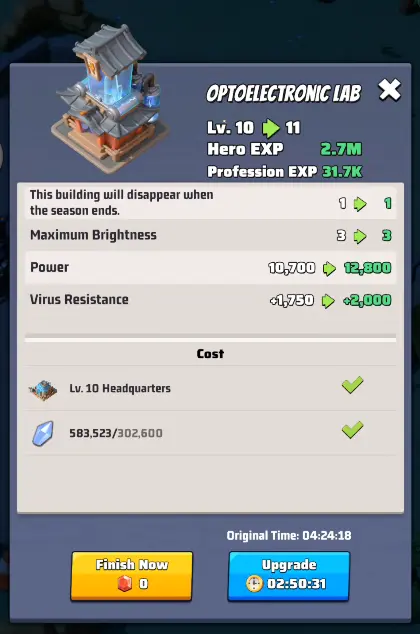
The Optoelectronic Lab is the most important personal progression building in Season 4. It uses Quartz and can reach level 35.
Lab upgrades increase Virus Resistance and unlock higher Lighthouse Brightness at specific milestones.
| Lab Level |
Important Unlock |
| Level 2 |
Maximum Brightness L1 |
| Level 3 |
Maximum Brightness L2 and Generator II |
| Level 10 |
Maximum Brightness L3 and Generator III |
| Level 15 |
Generator IV |
| Level 20 |
Maximum Brightness L4 and faction reward eligibility requirement |
| Level 35 |
Maximum Lab level |
How to Increase Virus Resistance in Season 4
Upgrade the Optoelectronic Lab whenever Virus Resistance is preventing your squad from efficiently fighting the next seasonal enemy or territory defender.
Lighthouse Brightness also adds temporary Light Virus Resistance:
| Brightness |
Light Virus Resistance |
Morale |
| L1 |
+50 |
— |
| L2 |
+150 |
— |
| L3 |
+250 |
+3% |
| L4 |
+250 |
+5% |
This means a player slightly below an enemy’s requirement may sometimes solve the problem by increasing Brightness. However, Lighthouse buffs should supplement Lab progression rather than replace it.
Quartz Workshop Upgrade Strategy
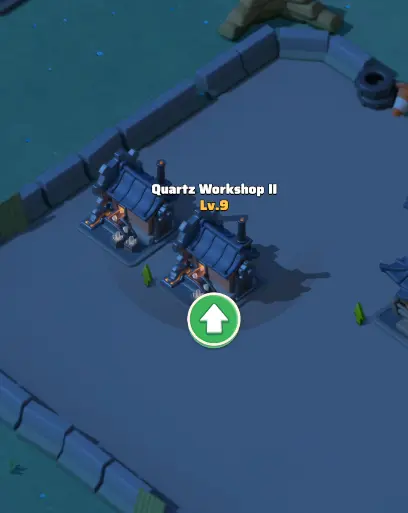
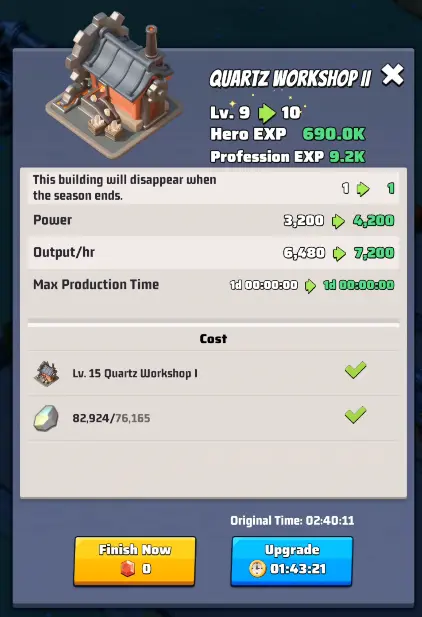
Quartz Workshops use Stone and produce Quartz continuously. Each Workshop can reach level 35.
Every level adds
720 Quartz per hour, while the Stone cost rises at higher levels. This makes lower-level Workshop upgrades more efficient for increasing hourly output.
| Workshop Rule |
Detail |
| Maximum level |
35 |
| Production gained per level |
720 Quartz/hour |
| Permanent Workshops |
I through V |
| Next Workshop unlock |
Previous Workshop reaches level 15 |
| Upgrade resource |
Stone |
Best Workshop Order
- Build Workshop I and raise it to level 15.
- Build Workshop II and raise it to level 15.
- Continue the same process to unlock the remaining permanent Workshops.
- Once the full permanent set is available, bring lower Workshops up instead of pushing one far ahead.
The Weekly Pass provides an additional temporary Workshop with its own progression requirements. Its production disappears when the pass ends, so do not treat it as permanent income.
✓Recommendation
Prioritize Workshop efficiency early, but do not delay an important Lab breakpoint just to keep every Workshop perfectly balanced. If the next City, Stronghold, or Blood Night target requires more Virus Resistance, spend the Quartz and advance the Lab.
Lighthouse, Power, and Brightness
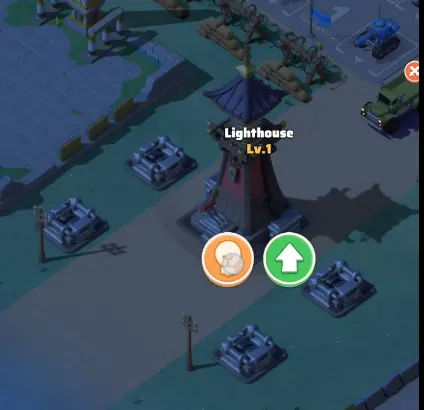
The Lighthouse is the center of Season 4’s light system. It stores power from generators and alliance support, then consumes that power according to the Brightness you select.
Higher Brightness provides a larger illuminated range and stronger buffs, but it also increases power consumption.
Do Not Leave L4 On Automatically
L4 is useful during important fights because it provides +250 Light Virus Resistance and +5% Morale. It is not automatically the best setting for routine activity.
- Use lower Brightness for ordinary base lighting when power income is limited.
- Raise Brightness when additional Virus Resistance or Morale changes the result of an important fight.
- Watch your stored power before Blood Night.
- Use Alliance Center power when your base is positioned within its territory.
Lighthouse Auto-Adjustment
The auto-adjustment option can lower Brightness when consumption exceeds power generation and raise it when enough power becomes available again.
This is particularly useful during Blood Night, when Lighthouse power consumption increases sharply.
Important: manually changing Brightness after enabling auto-adjustment disables the automatic setting. Re-enable it afterward if you still want the Lighthouse to manage Brightness automatically.
Generators and Electricians
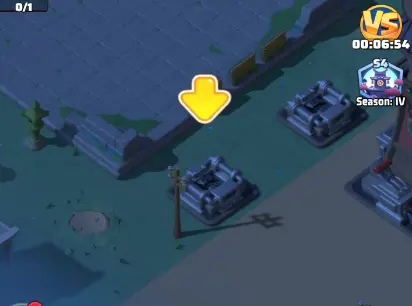
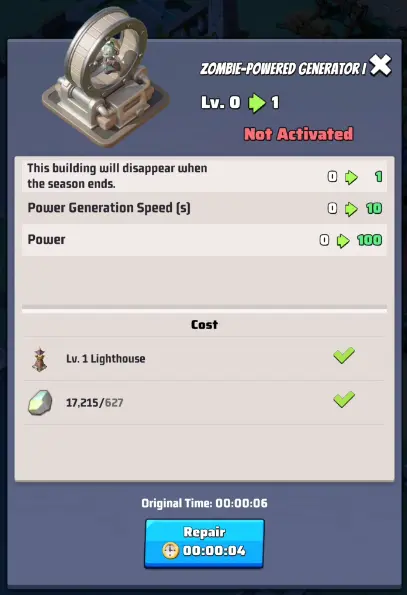
The Lighthouse needs Zombie-powered Generators. Each activated generator provides one Electrician.
| Generator |
Requirement |
| Generator I |
Lighthouse level 1 |
| Generator II |
Optoelectronic Lab level 3 |
| Generator III |
Optoelectronic Lab level 10 |
| Generator IV |
Optoelectronic Lab level 15 |
After repairing a generator, kill the required world zombies and return to activate it.
What Electricians Do
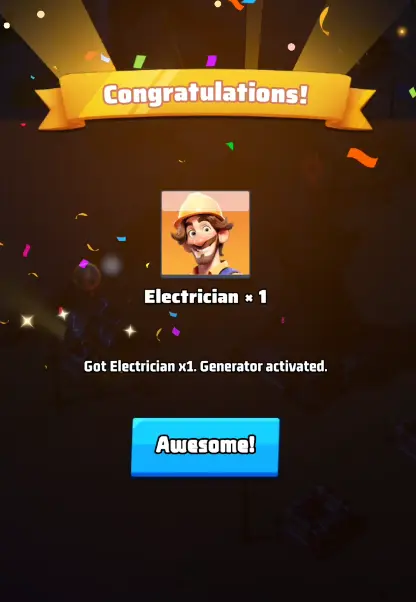
Electricians have several competing uses:
- Operate personal generators.
- Provide power support to an alliance member.
- Travel with a squad and provide light in darkness.
- Help reduce darkness-related problems while fighting seasonal enemies.
- Discover or charge Maneki-neko.
- Charge the Divine Tree.
- Interact with Profession skills that reward assistance.
Do not send every Electrician away if your own Lighthouse cannot maintain the Brightness needed for current objectives.
Blood Night Descend Schedule and Strategy
Blood Night Descend begins on Day 2 of Week 1 and remains one of the most important recurring Season 4 activities.
Blood Night occurs every day at:
- 02:30 server time
- 10:30 server time
- 18:30 server time
Each round lasts
30 minutes.
!Blood Night Power Warning
Blood Night increases Lighthouse power consumption by 18,000 per minute. Enable Brightness auto-adjustment, keep stored power available, and check Electrician assignments before the event starts. Manually changing Brightness afterward switches auto-adjustment off again.
What Changes During Blood Night?
- Zombies and Doom Elites become stronger.
- The Virus Resistance requirement increases.
- World enemies can move and attack bases.
- First-kill progression becomes available again for Blood Night enemies.
- Zombies can drop Tactics Cards.
- Oni Generals appear in owned Cities.
- Magatama and other seasonal rewards become available.
Current Season 4 rules add +500 to the Virus Resistance requirement of Blood Night enemies, making Lab progression and Lighthouse Brightness especially important.
Blood Night Stages
| Stage |
Timing |
Main Addition |
| Stage 1 |
Week 1 |
Night Parade of One Hundred Oni and Oni Generals |
| Stage 2 |
Week 2 |
Wandering Oniwagon Invasion |
| Stage 3 |
Week 3 through Week 7 |
Blood Night Oni Legions and Oni Summon gameplay |
| Stage 4 |
Week 8 |
Towards the Light and Holy Mountain |
Stage 4 starts on Day 1 of Week 8. Once the warzone fully charges the Holy Mountain, light returns to Sakura Isle and Blood Night stops.
Blood Night Preparation Checklist
- Check Lighthouse power storage.
- Enable Brightness auto-adjustment.
- Verify that you have not disabled it with a manual Brightness change.
- Keep enough Electricians at home for the power level you need.
- Raise Brightness if the extra Resistance or Morale is required.
- Save stamina for Blood Night first kills and Oni objectives.
- Follow alliance instructions for Oni Generals.
- Keep Hospital and Emergency Center capacity available.
Alliance Center Guide
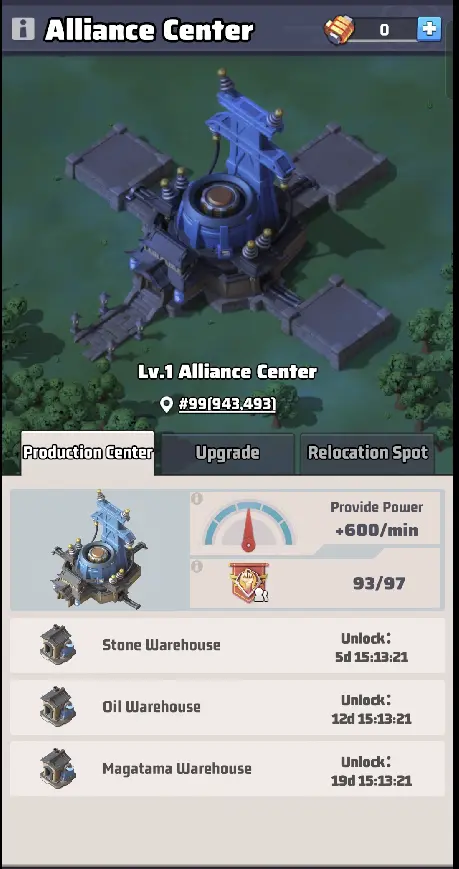
The Alliance Center mission opens in Week 1. Once the warzone donation requirement is completed, R4/R5 officers can place its construction site and alliance members can send squads to build it.
The Alliance Center:
- Produces Copper.
- Provides buffs within its territory.
- Supplies power to nearby Lighthouses.
- Unlocks three additional resource buildings over time.
- Levels automatically according to accumulated Copper.
Alliance Center Resource Buildings
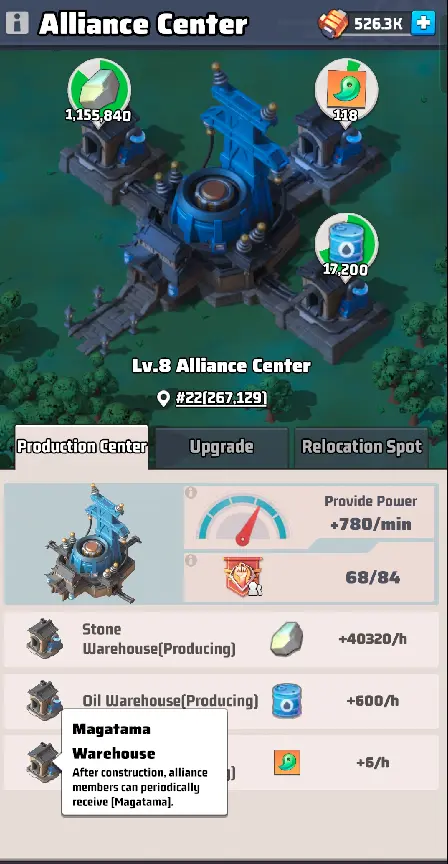
| Building |
Unlock |
Production |
| Stone Warehouse |
7 days after season start |
40,320 Stone/hour |
| Oil Warehouse |
14 days after season start |
600 Oil/hour |
| Magatama Warehouse |
21 days after season start |
6 Magatama/hour |
Each building must be repaired before it starts producing. Damaged buildings stop production, and destroying these buildings during Copper War allows attackers to steal part of the defending alliance’s Copper.
The additional buildings stop producing on Day 1 of Week 8, so members should claim their available resources regularly before settlement.
Alliance Center Relocation
Relocation requires a new Alliance Center relocation spot. Once placed, that site cannot simply be moved somewhere else; the alliance must complete or abandon the plan through the available game rules.
Relocation sites can also be attacked while they are being built, making their placement a strategic decision rather than just a logistical one.
Leadership should consider territory routes, enemy alliances, Copper War schedules, member relocation time, and defensibility before placing the site.
Season 4 Map, Cities, and Digging Strongholds
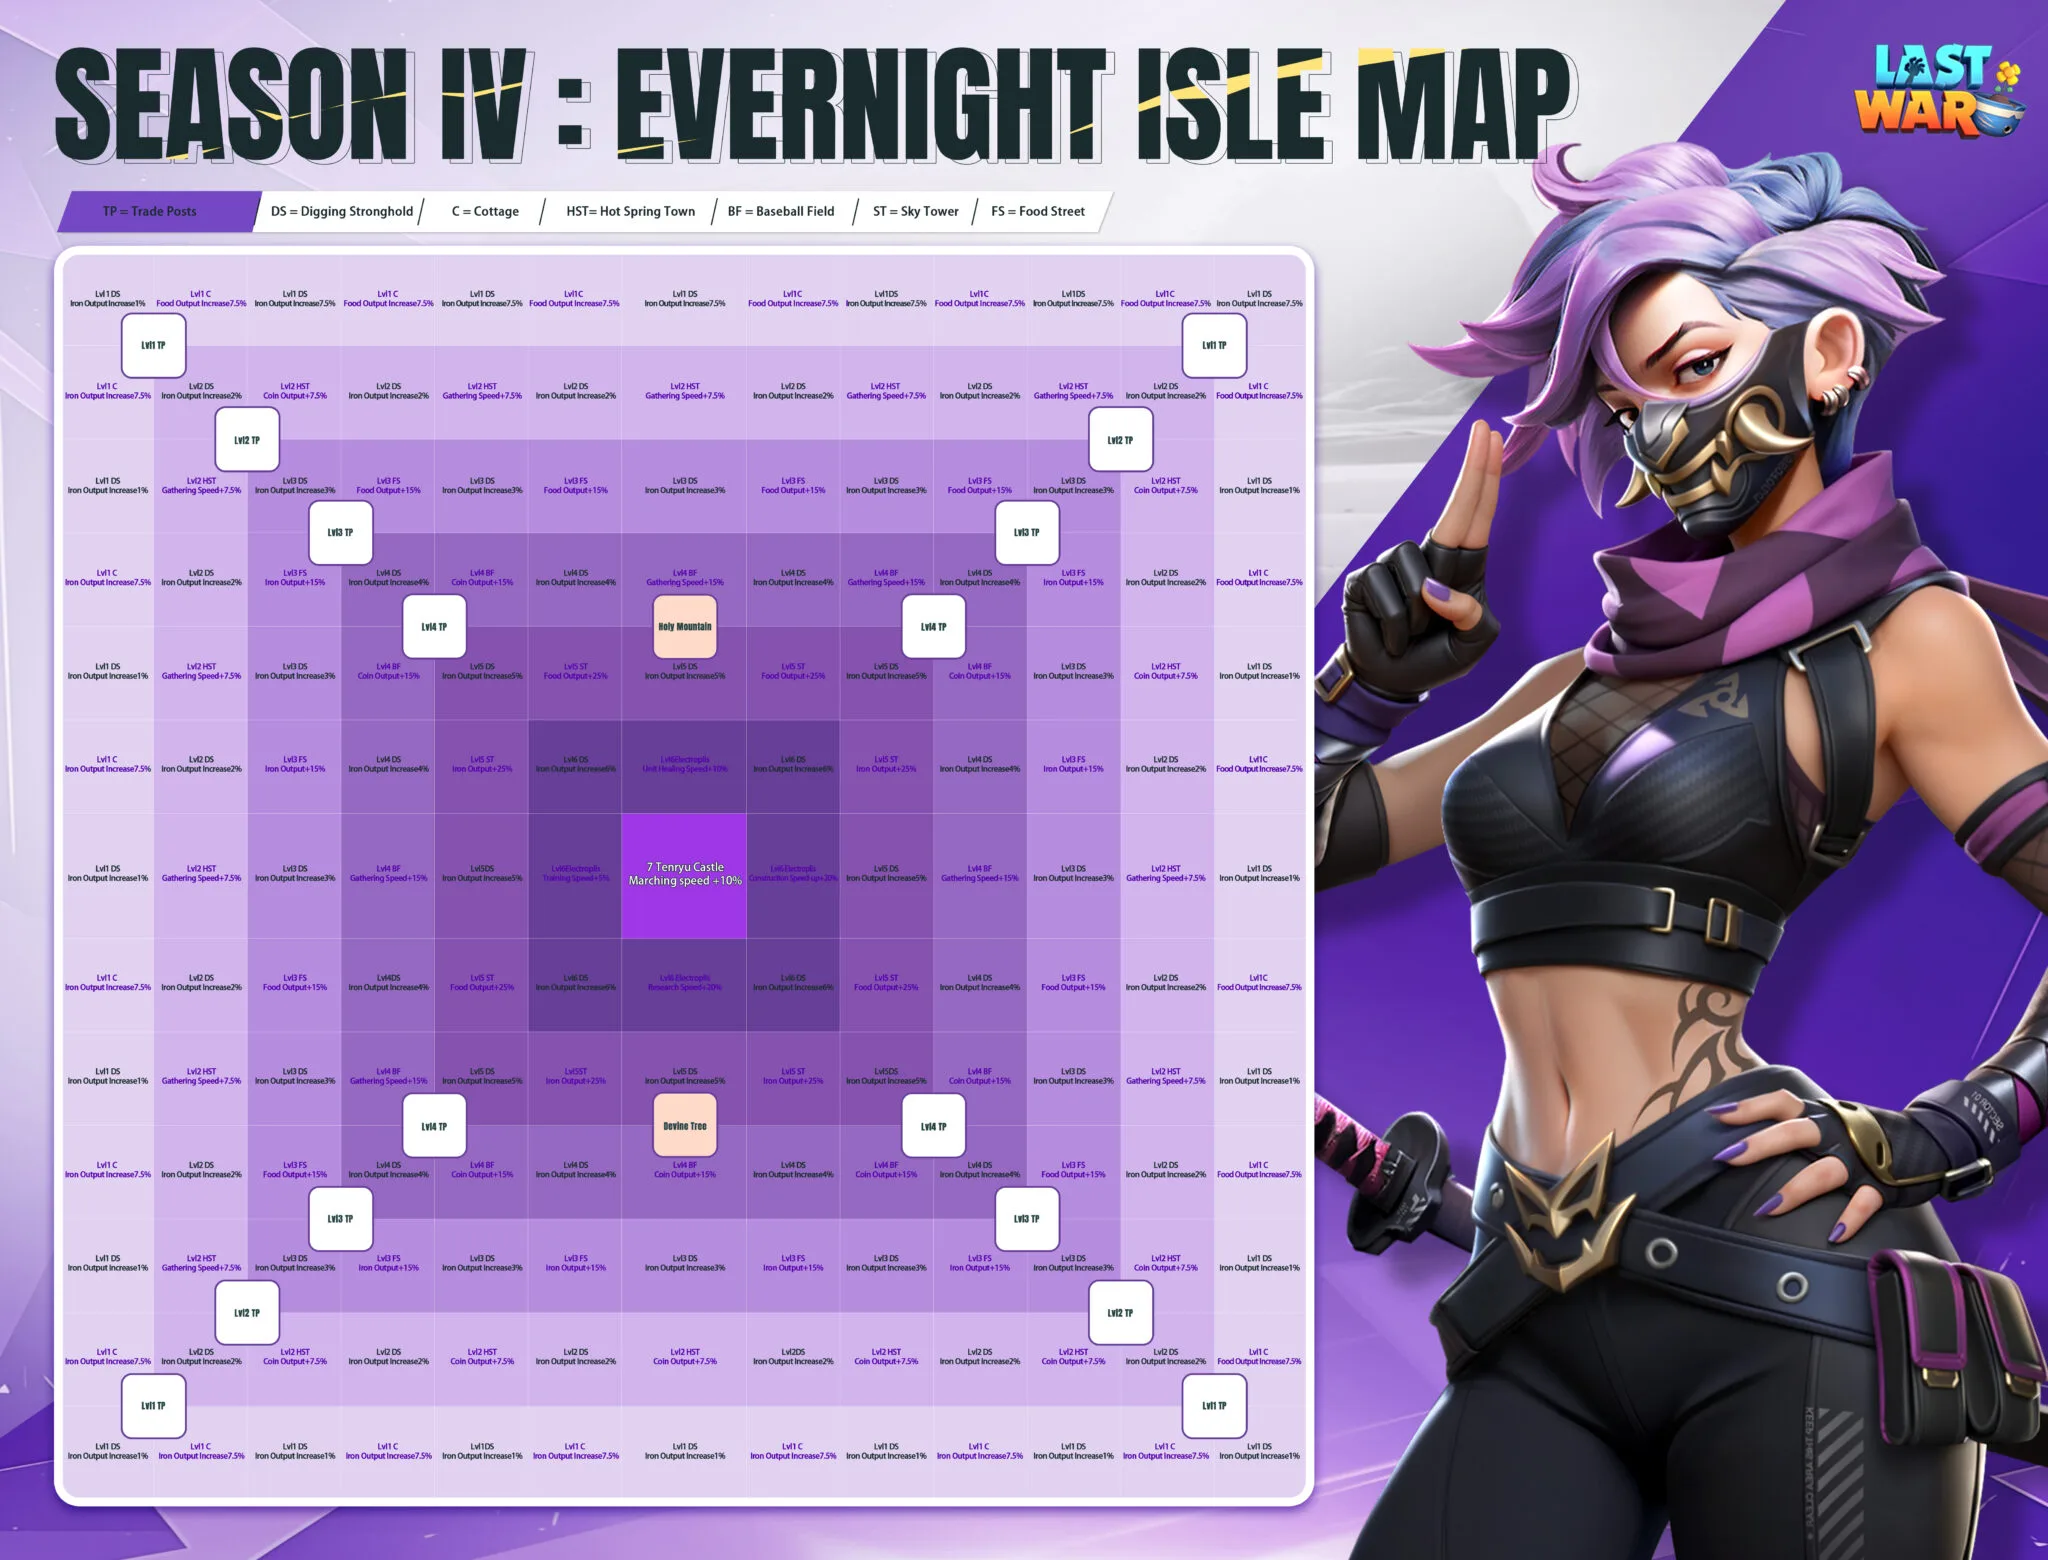
Season 4 territory includes Cities, Digging Strongholds, Trade Posts, the Divine Tree, Holy Mountain, Sushi Restaurants, and Alliance Centers.
Important territory rules include:
- Alliances begin without their previous City ownership.
- Territories touching at a corner count as connected.
- An alliance without territory must begin with a level 1 Digging Stronghold.
- City capture follows the City Clash event schedule.
- Trade Posts do not require connected alliance territory.
- Seasonal alliance resource tiles do not provide Stone or Quartz.
City Copper Production
Cities generate Copper continuously after capture.
| City Level |
Copper per Hour |
| Level 1 |
100 |
| Level 2 |
200 |
| Level 3 |
300 |
| Level 4 |
400 |
| Level 5 |
500 |
| Level 6 |
600 |
An alliance can declare up to two City wars per day and hold up to six Cities.
Higher-level Cities produce more Copper, but early ownership also matters. A lower-level City captured several days earlier can generate significant additional total Copper.
When Do City Levels Unlock?
- Level 1: Week 1, Day 3.
- Level 2: Week 1, Day 6.
- Level 3: Week 2, Day 3.
- Level 4: Week 2, Day 6.
- Level 5: Week 3, Day 3.
- Level 6: Week 3, Day 6.
- Level 7 Tenryu Castle: late Week 4.
The actual capture window begins after the event’s displayed delay, so use the City Clash countdown before scheduling a rally.
Unlocking City Buffs
Capturing a City does not immediately activate all of its buffs. Alliances must defeat the Oni General associated with an owned City during Blood Night before its buff becomes active.
This makes Blood Night participation part of territory progression rather than an optional side activity.
Digging Strongholds
Digging Strongholds are alliance territory objectives that produce Stone.
| Stronghold Level |
Stone per Hour |
| Level 1 |
100 |
| Level 2 |
120 |
| Level 3 |
140 |
| Level 4 |
160 |
| Level 5 |
180 |
| Level 6 |
200 |
An alliance can successfully capture two Digging Strongholds per day and hold up to six.
Strongholds are protected by Oni Samurai, Oni Dōji, and Oni Tengu. Check the defender’s troop weakness and Virus Resistance requirement before organizing rallies instead of assuming the highest-Power squad is always the best leader.
Copper War Strategy
Copper War starts in Week 4 and continues through the later active weeks. It replaces cross-warzone City capture as the main way alliances directly contest each other’s seasonal ranking resource.
The season uses multiple Copper War rounds, with matchups narrowing as the event progresses so similarly ranked alliances increasingly face each other.
What Can Attackers Destroy?
An Alliance Center has three secondary buildings during Copper War:
- Stone Warehouse.
- Oil Warehouse.
- Magatama Warehouse.
Destroying each support building can plunder 3% of the defending alliance’s Copper. Destroying the Alliance Center can plunder another 6%, creating a maximum documented 15% plunder if all three support structures are destroyed before the Center.
Destroying the Alliance Center ends the war immediately, so an attacking alliance trying to maximize Copper should not destroy it before the support structures if the battle situation allows.
Defending Copper
- Reinforce the Center and each secondary building you intend to protect.
- Repair damaged structures before the next war.
- Do not leave a relocation site exposed immediately before conflict.
- Coordinate shields and teleports around the Alliance Center area.
- Keep Hospital space and healing speedups available.
- Follow R4/R5 assignments instead of concentrating every squad in one structure.
The
Hospital guide and
Emergency Center guide can help prepare for high-casualty seasonal wars.
Trade Posts
Trade Posts unlock in Week 3 and range from level 1 to level 4.
Contests occur at
12:00 server time on Tuesdays and Fridays and last one hour.
Important rules:
- Your base must be on nearby Contaminated Land to participate.
- Connected alliance territory is not required.
- Progress is tracked individually.
- Players from the same alliance do not fight each other.
- The highest progress wins a neutral Trade Post.
- An owned Post must reach 100% capture progress to change Governors.
The Governor can summon a Trade Caravan. Alliance members receive discounts, while the Governor gains access to additional benefits. During Blood Night, another Caravan can be called with different inventory and separate purchase limits.
Maneki-neko
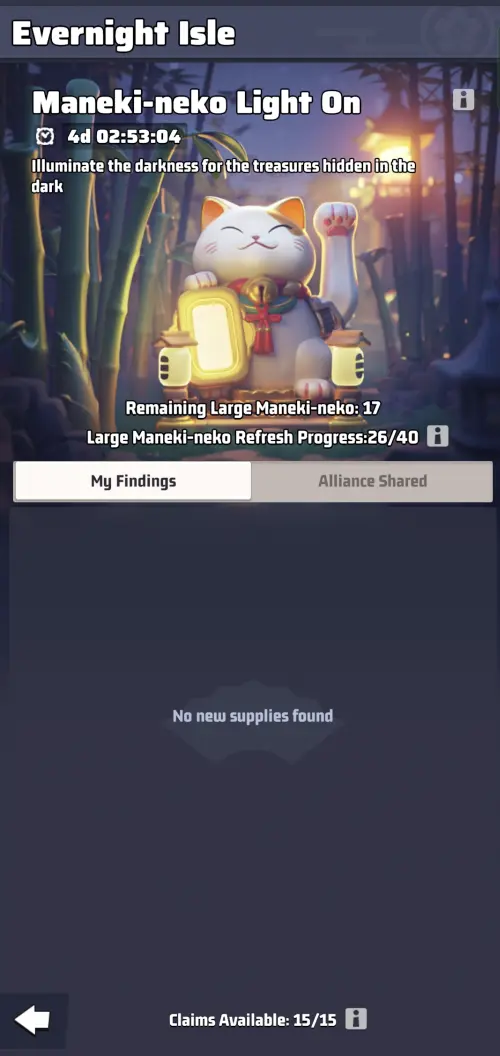
Maneki-neko are hidden seasonal rewards whose locations differ between warzones.
- Large Maneki-neko can be revealed by light or Flare effects.
- Mini Maneki-neko can be discovered while marching with light.
- Only one Mini Maneki-neko can be discovered per player per day.
- Discovered Maneki-neko must be charged by an Electrician.
- Large Maneki-neko restore three reward claims per day, with up to 15 claims stored.
- Mini Maneki-neko are personal to the player who discovered them.
Do not rely on coordinates from another warzone for Large Maneki-neko because their locations are not shared universally.
Sushi Restaurants

Season 4 has 10 fixed Sushi Restaurants. They unlock progressively from Week 1 through Week 4 and remain claimable through Week 8.
If an unlocked Restaurant is still dark, illuminate it by moving close enough for your Lighthouse to reach it or by using an appropriate Flare Bomb Profession skill.
Once illuminated, click the Restaurant to claim its one-time reward.
Divine Tree, Ryōtei Restaurant, and Holy Mountain
Several other seasonal activities unlock over the eight-week timeline:
| Activity |
Main Role |
| Ryōtei Restaurant |
Week 2 seasonal mini-game and rewards |
| Divine Tree |
Alliance charging activity using Electricians with Fortune Draw rewards |
| Blood Night Hunter |
PvP-oriented transformation mode unlocked in Week 2 |
| Holy Mountain |
Week 8 objective that ends the darkness once fully charged |
| Izakaya Bar |
Seasonal Radar mini-game |
| Purge Action |
Early-season zombie elimination ranking event |
Use the
Last War Event Hub guide to compare seasonal events with your normal event schedule.
Sarah UR Promotion
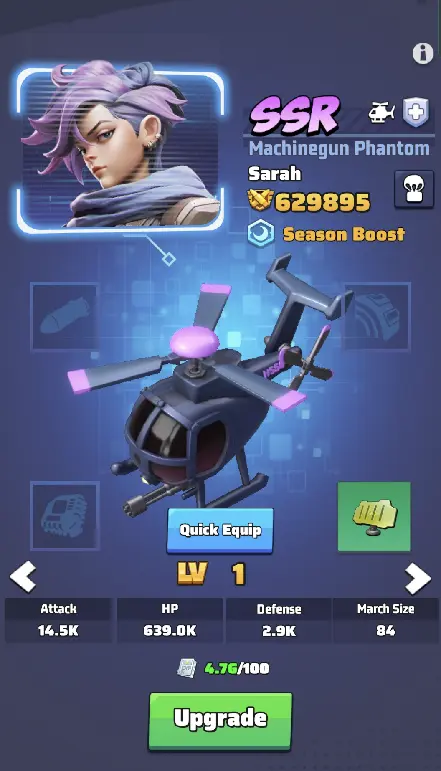
Sarah’s UR promotion opens on Day 1 of Week 3 and remains available for the documented 42-day promotion window.
To promote Sarah:
- Sarah must be 5 stars.
- You need the Legendary Hero Badge earned through Season Goals.
What Happens After Promotion?
- Sarah changes from SSR to UR.
- Her hero EXP level remains unchanged.
- Her star level resets to 3 stars.
- Her skills reset to level 1 with her UR skill set.
- Previously invested Skill Medals are refunded.
- Wall of Honor shards are refunded as Sarah-specific shards.
- Shards originally used to bring SSR Sarah to 5 stars are not refunded.
Current Season 4 documentation lists 1,600 eligible SSR/Sarah shards to rebuild her from 3-star UR back to 5 stars. Do not promote immediately before a major war unless you have enough resources to restore the version of Sarah your team needs.
Use the
Hero Shards guide and
Skill Medal guide before committing the promotion.
Mason, Violet, and Scarlett Promotion

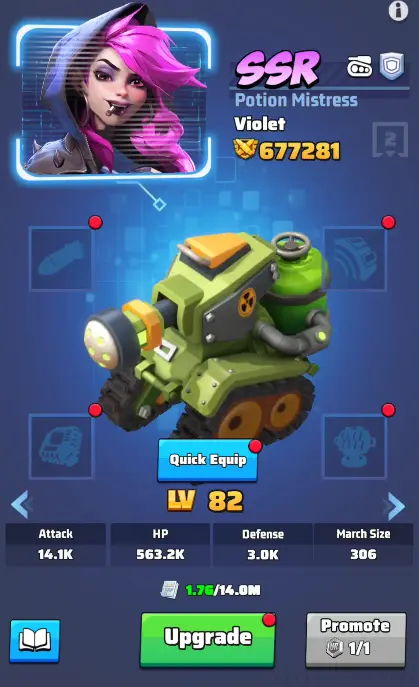
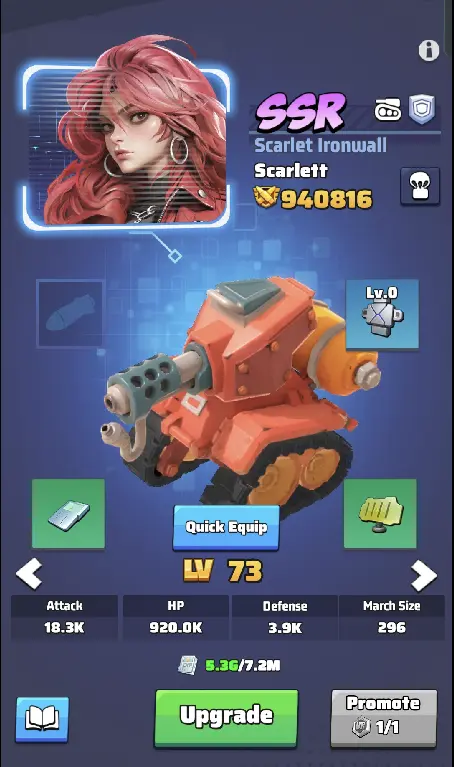
If you still have the required promotion items from earlier seasonal systems, Mason, Violet, and Scarlett can also be promoted during Season 4.
Complete eligible promotions before Week 8 begins; otherwise, the next promotion window may not arrive until the following season.
Review the
Violet guide and
Wall of Honor guide before converting a hero that already has significant Honor investment.
S4 Legend Returns
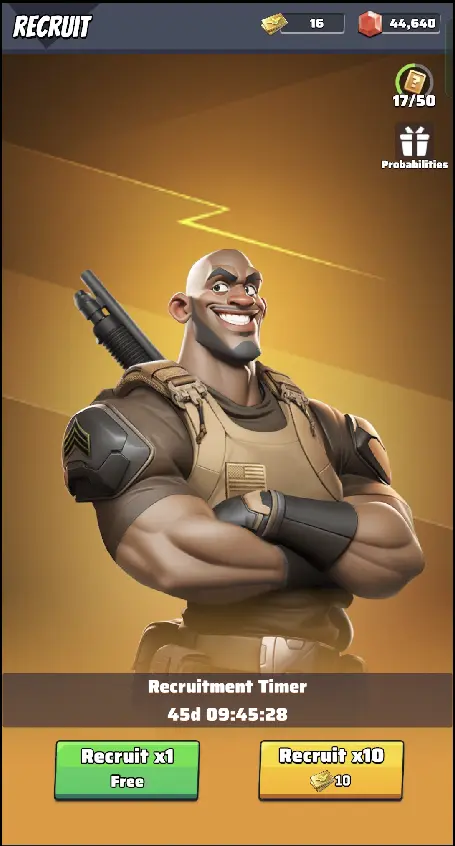
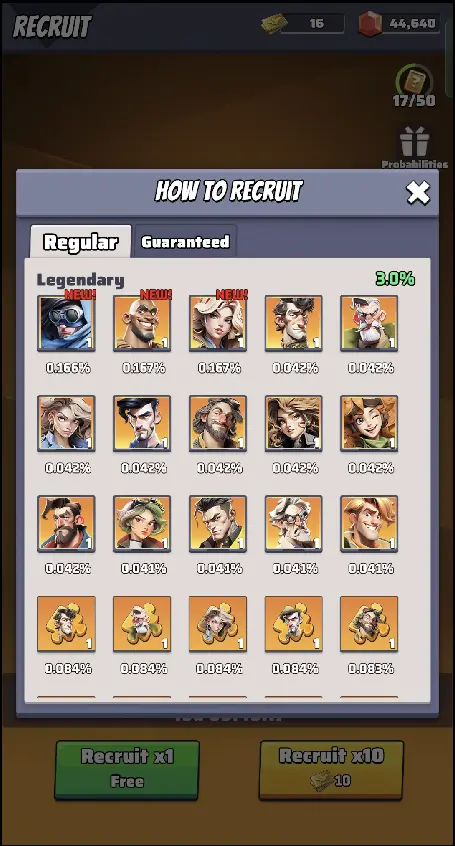
S4 Legend Returns starts early in the season and can provide UR heroes alongside Stone, Quartz, and other rewards.
Before spending tickets:
- Check the current hero pool.
- Prioritize heroes used by your main squad.
- Review the guaranteed recruitment rules in the current interface.
- Coordinate pulls with Alliance Duel or Arms Race when practical.
- Do not spend valuable tickets only to obtain small amounts of Stone or Quartz.
The
Last War Tavern guide explains how recruitment pools change as servers mature.
Season 4 Exclusive Weapons
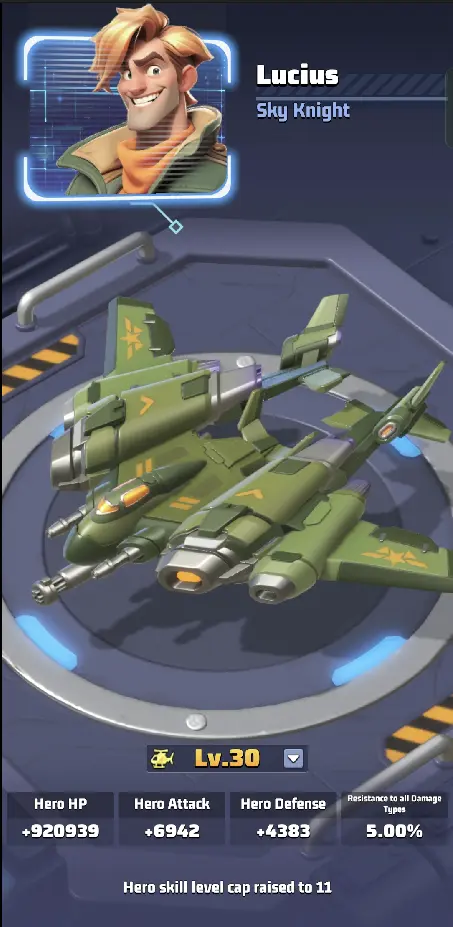
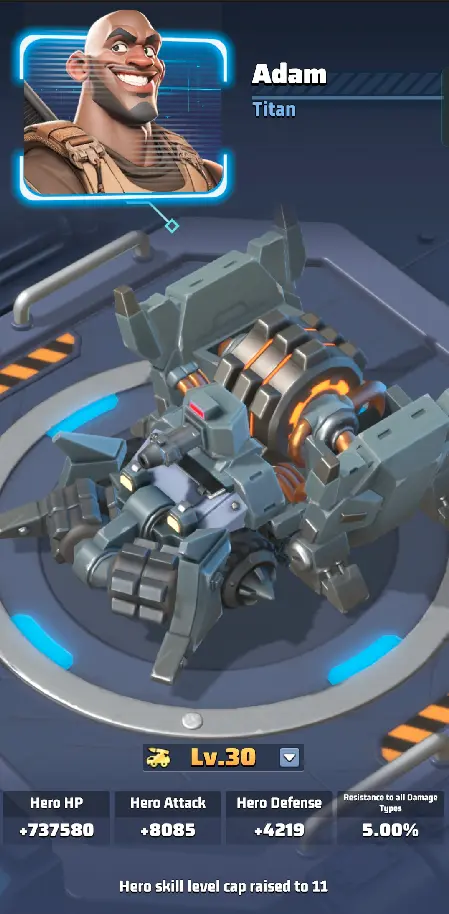
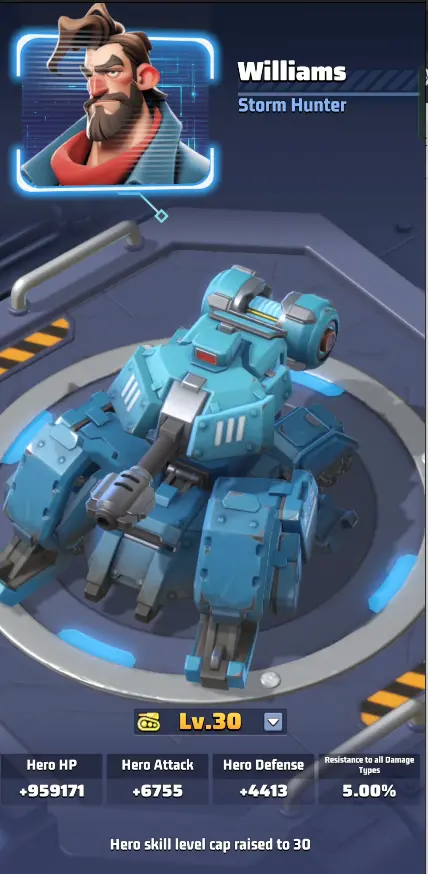
| Hero |
Release |
Formation |
| Lucius |
Day 4 of Week 1 |
Aircraft |
| Adam |
Day 4 of Week 3 |
Missile |
| Williams |
Day 4 of Week 6 |
Tank |
Each weapon requires the hero at 5 stars and 50 hero-specific Exclusive Weapon Shards for initial activation. Universal Exclusive Weapon Shards can be used after activation.
Which Season 4 Weapon Should You Prioritize?
- Aircraft main: Lucius is the natural Season 4 weapon target if he remains in your frontline.
- Missile main: Adam’s weapon expands his counterattack and defensive utility.
- Tank main: Williams provides the relevant frontline weapon progression.
Do not activate all three simply for collection. Prioritize the hero used in your main squad, then evaluate weapon level 10 and level 20 milestones before committing Universal Shards toward level 30.
Exclusive Weapon investment should not come at the cost of essential
gear progression or core hero skills.
Profession Skills and Tactics Cards
The Season 4 Profession level cap is 100, and the Diplomat profession is not available.
Season-specific skills can interact with:
- Electrician support.
- Lighthouse and light mechanics.
- Flare Bomb illumination.
- Blood Night Hunter.
- Oni Summon.
- Trade Posts.
- Copper War.
Tactics Cards add another seasonal combat and resource layer. Cards can drop during Blood Night and provide base effects, skills, and additional stats.
Do not upgrade every card evenly. Prioritize cards that improve your primary formation or the alliance role you actually perform.
Season 4 Daily Routine
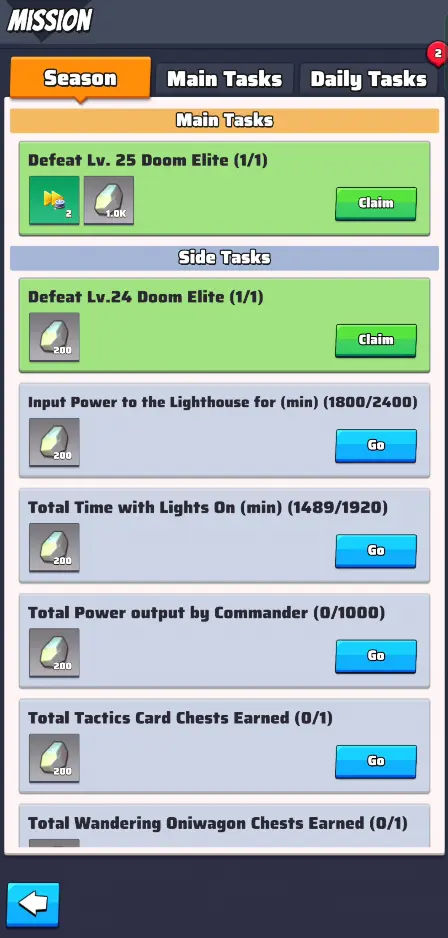
- Claim Quartz from every Workshop.
- Claim available Stone from alliance Strongholds and buildings.
- Claim Alliance Center resource production.
- Check Lighthouse power and Brightness settings.
- Review Electrician assignments.
- Complete Season Quests.
- Complete useful seasonal Radar activities.
- Use the daily Doom Walker First Blood reward efficiently.
- Prepare for Blood Night rounds you can attend.
- Check Maneki-neko and Sushi Restaurant opportunities.
- Follow City, Stronghold, Trade Post, and Copper War announcements.
- Coordinate large hero and building upgrades with Alliance Duel when useful.
The
Alliance Duel guide can help avoid wasting upgrades on the wrong scoring day.
Season Battle Pass
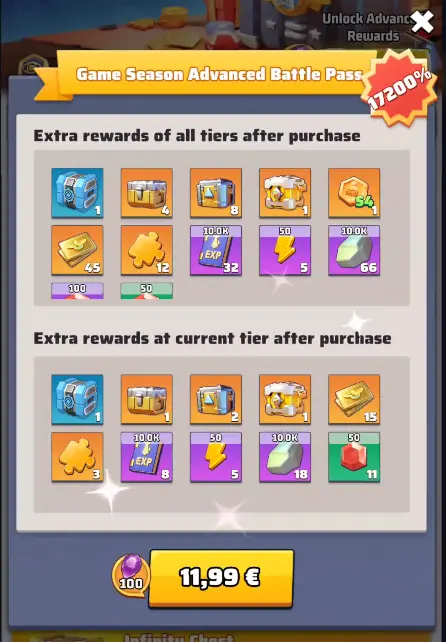
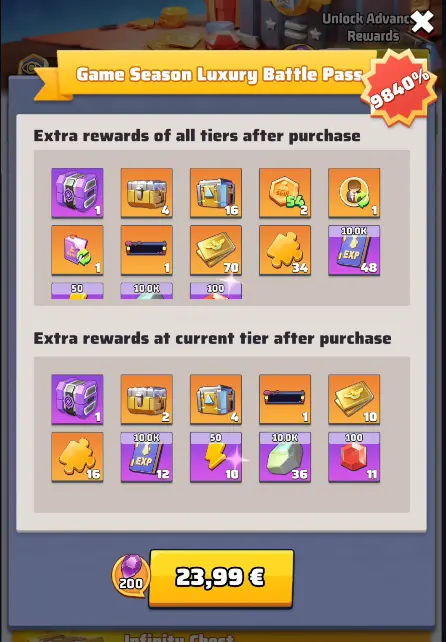
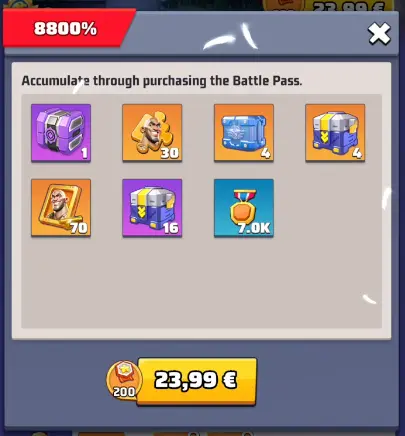
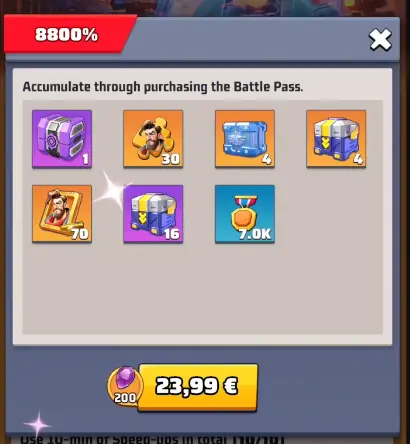
The Season Battle Pass contains free and paid reward tracks with Stone, Quartz, Profession resources, recruitment items, Hero Shards, speedups, Tactics Cards, and other seasonal materials.
The Advanced and Luxury reward columns are separate purchases. Buying one does not automatically unlock both.
For spenders, early seasonal production boosts usually have more time to generate value than purchases made immediately before settlement. Still, buy around actual bottlenecks rather than automatically buying every seasonal pack.
Weekly Pass
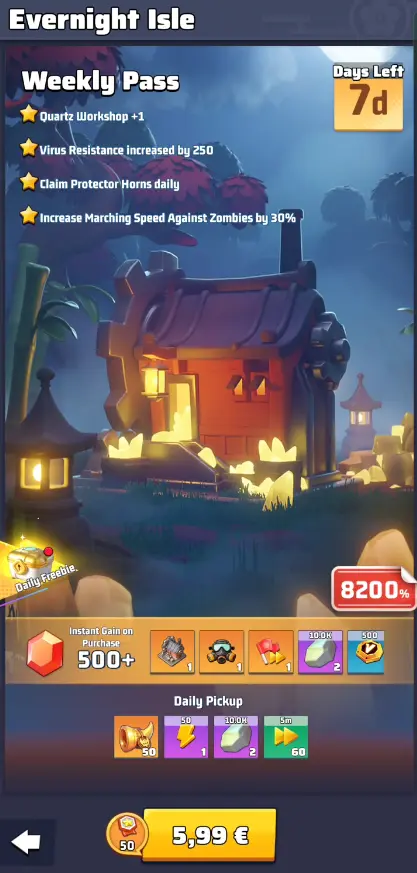
The Weekly Pass lasts seven days and can provide:
- An additional temporary Quartz Workshop.
- Temporary Virus Resistance.
- March Speed against zombies.
- Stone.
- VIP Points.
- Protector Horns.
- Stamina.
- Speedups.
The temporary Workshop and Resistance bonus disappear with the pass. Do not calculate future Lab or enemy progression as though those benefits are permanent.
Exclusive Weapon Passes
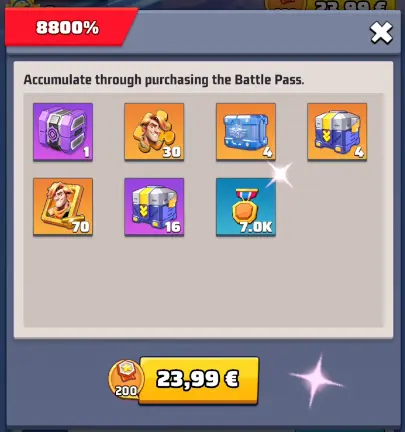
Before buying a weapon pass:
- Confirm the hero is or can become 5 stars.
- Make sure the hero belongs to your long-term formation.
- Confirm you can obtain the named shards required for activation.
- Compare the weapon with gear, skills, and another hero’s higher-impact upgrade.
Season 4 Goals and Rewards
Season Goals include both personal and alliance progress.
- Individual Goals: focus heavily on Lighthouse activation and remaining in the Light state.
- Alliance Goals: include Digging Stronghold capture progression.
Individual rewards include Stone, Quartz, Sarah Shards, the Legendary Hero Badge, Tactics Cards, and other progression items.
Faction Rewards
Optoelectronic Lab level 20 or higher is required under the documented Season 4 faction reward rules. The requirement is checked when Week 8 settlement begins.
This makes Lab level 20 an important baseline target even for players who do not intend to max the Lab to 35.
F2P Season 4 Strategy
Free-to-play players can contribute effectively by maximizing recurring production and alliance participation instead of trying to compete with every paid progression system.
- Complete Season Quests consistently.
- Unlock Quartz Workshops as early as practical.
- Upgrade lower Workshops efficiently.
- Push the Optoelectronic Lab toward level 20.
- Activate all four generators.
- Use the lowest Brightness that solves the current task.
- Enable auto-adjustment before Blood Night.
- Join Oni General, City, Stronghold, and Copper War activities.
- Save Sarah shards before Week 3 if she fits your plans.
- Choose one Season 4 Exclusive Weapon instead of chasing all three.
- Spend Magatama on progression items that improve your main account.
- Stay in an active alliance.
Players who prefer to start from an already-developed roster rather than rebuilding every seasonal prerequisite can compare
Last War accounts and verify the server season, heroes, troop tier, gear, Exclusive Weapons, and other progression shown on each listing before choosing.
Common Season 4 Mistakes
- Ignoring Quartz production: Weak Workshops slow every later Lab upgrade.
- Maxing one Workshop while leaving others low: Every Workshop level adds the same 720 Quartz/hour while costs rise at higher levels.
- Ignoring Virus Resistance: High squad Power cannot fully compensate for being far below seasonal requirements.
- Leaving L4 active permanently: Maximum Brightness wastes power when lower light is sufficient.
- Forgetting auto-adjustment before Blood Night: Increased power use can leave the base dark.
- Changing Brightness after enabling auto-adjustment: The manual change disables the automatic setting.
- Delaying generators: Every missing generator means one fewer Electrician and less power flexibility.
- Ignoring Oni Generals: Captured City buffs remain locked until the relevant General is defeated.
- Capturing territory without a Copper plan: Early production and defensible routes are more valuable than random ownership.
- Protecting only the Alliance Center during Copper War: Support buildings also contain Copper value.
- Destroying the enemy Center too early: Attackers trying to maximize Copper should consider the support buildings before ending the war.
- Promoting Sarah without enough shards: She returns as a 3-star UR hero and needs substantial rebuilding.
- Trying to activate weapons with Universal Shards: Initial activation requires named hero-specific shards.
- Chasing Lucius, Adam, and Williams simultaneously: Focus the weapon that supports your main squad.
What Happens at the End of Season 4?
Settlement begins on Day 1 of Week 8. Alliance Copper rankings become locked, many regular season event tiles close, and the season moves toward its final Capitol and Holy Mountain activities.
At the end of Day 7 of Week 8:
- The Season 4 interface closes.
- The Optoelectronic Lab disappears.
- Quartz Workshops disappear.
- The Lighthouse and generators disappear.
- The Alliance Center and its seasonal structures disappear.
- Season Profession skills are removed and their skill points are refunded.
- Seasonal Tactics Card systems close and eligible items are converted according to the current settlement rules.
- Remaining seasonal resources are handled through the listed end-of-season conversion system.
Transfer Surge also begins during Week 8, followed by off-season and Celebration content before progression toward
Season 5 Wild West.
FAQs
How do you increase Virus Resistance in Last War Season 4?
Upgrade the Optoelectronic Lab with Quartz. Lighthouse Brightness also adds temporary Light Virus Resistance, with L3 and L4 providing +250, but Lab progression is the permanent Season 4 solution.
What is the Blood Night schedule in Season 4?
Blood Night occurs daily at 02:30, 10:30, and 18:30 server time. Each round lasts 30 minutes.
What should I upgrade first in Season 4?
Build Quartz production early, then upgrade the Optoelectronic Lab whenever Virus Resistance or a Brightness breakpoint becomes the next bottleneck. Activate each generator as soon as its Lab requirement is met.
What Optoelectronic Lab level should I reach?
Level 20 is an important minimum target because it unlocks Lighthouse L4 and is required for documented faction rewards. The Lab itself can reach level 35.
When can Sarah become UR?
Sarah’s UR promotion opens on Day 1 of Week 3. She must already be 5 stars and requires the Legendary Hero Badge from Season 4 progression.
Which heroes get Exclusive Weapons in Season 4?
Lucius receives his weapon on Day 4 of Week 1, Adam on Day 4 of Week 3, and Williams on Day 4 of Week 6. Each hero must be 5 stars, and activation requires 50 named weapon shards.
Conclusion
Season 4 Evernight Isle rewards players who build a strong seasonal economy instead of relying only on squad Power. Unlock Quartz Workshops early, keep the Optoelectronic Lab moving, activate all four generators, and use Lighthouse Brightness intelligently so you have enough power when Blood Night or a major battle begins.
For alliances, capture Copper-producing Cities early, keep Digging Strongholds generating Stone, unlock City buffs through Oni Generals, and protect every important Alliance Center structure during Copper War. For more seasonal walkthroughs, hero builds, and progression advice, visit the
Heaven Guardian Last War guides.