
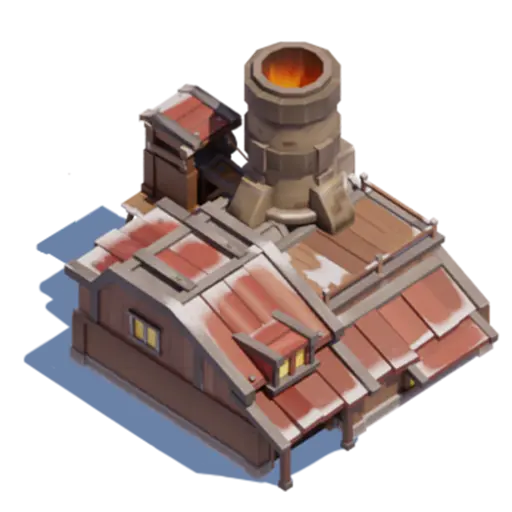
The Whiteout Survival Iron Mine is the city building responsible for producing Iron. It unlocks at Furnace Level 5 and can be upgraded through Level 30.
Iron initially appears less important than Wood or Coal. Nevertheless, its value rises quickly as buildings, research, and troop training begin requiring larger quantities. A neglected Iron Mine can eventually delay several progression systems at the same time.
This guide covers the Iron Mine unlock requirement, Level 1-30 costs, furniture, Smith’s Iron bonuses, production research, gathering, upgrade priorities, and practical ways to prevent an Iron shortage.
The Iron Mine unlocks at Furnace Level 5 and reaches Level 30. Complete the first five levels early, research Iron Output, use Smith for production and gathering bonuses, and combine city output with map gathering and event rewards.
What Does the Iron Mine Do?
The Iron Mine is the fourth production building unlocked in Whiteout Survival. Its main function is to generate Iron passively inside the city.
| Iron Mine feature | Details |
|---|---|
| Building type | Resource production building |
| Resource produced | Iron |
| Unlock requirement | Furnace Level 5 |
| Maximum level | Level 30 |
| Maximum building power | 30,470 at Level 30 |
| Associated Growth hero | Smith |
Upgrading the building strengthens passive production and increases building power. However, city output alone will not cover every late-game requirement. Gathering, events, missions, resource boxes, and Alliance rewards remain important.
When Does the Iron Mine Unlock?
The Iron Mine unlocks at Furnace Level 5.
Unlike many production buildings, it can immediately progress through several levels after appearing:
- Iron Mine Levels 1-5 require Furnace Level 5.
- Iron Mine Level 6 requires Furnace Level 6.
- Each later level requires the matching Furnace level.
- Iron Mine Level 30 requires Furnace Level 30.
The opening upgrades take only seconds and require very few resources. Consequently, completing Levels 1-5 shortly after unlocking the building is usually worthwhile.
What Is Iron Used For?
Iron is one of the four standard city resources. It supports several major progression systems:
- Furnace and city-building upgrades.
- Research Center technologies.
- Troop training.
- Military-building development.
- Production-building upgrades.
- Event tasks that require construction or resource spending.
- Later technology systems that include standard resources.
Iron costs are smaller than Wood or Meat costs in many upgrade tables. Even so, Iron is generated and gathered in smaller amounts, which can make it a frequent bottleneck.
How Iron Mine Production Works
The Iron Mine generates resources continuously while the building is operating. Several systems can increase its output.
| Production factor | Effect |
|---|---|
| Iron Mine level | Improves the building’s production progression and power |
| Assigned Survivors | Keep available workstations operating |
| Iron Output research | Increases passive Iron production inside the city |
| Smith’s Burnished Iron | Raises city Iron Mine output by up to 25% |
| Healthy workers | Help keep production positions filled consistently |
When production Survivors become sick, hungry, cold, or unavailable, the building may operate less effectively. Therefore, Furnace heat, food, housing, and treatment also support the city economy indirectly.
Iron Output vs Iron Gathering Speed
Iron Output and Iron gathering are separate mechanics.
| Bonus | Where it applies | Examples |
|---|---|---|
| Iron Output | Iron produced inside the city | Iron Output research and Smith’s Burnished Iron skill |
| Iron Gathering Speed | Marches gathering from world-map Iron nodes | Iron Mining research and Smith’s Craftsmanship skill |
Improving city output will not make gathering marches faster. Likewise, gathering bonuses do not increase passive production inside the Iron Mine.
Smith’s Iron Production and Gathering Skills
Smith is the Rare Infantry Growth hero associated with Iron production and gathering.
| Smith skill | Effect | Maximum bonus |
|---|---|---|
| Burnished Iron | Increases city Iron Mine output | 25% |
| Craftsmanship | Increases Iron gathering speed on the world map | 25% |
Burnished Iron provides passive value after the skill is developed. Craftsmanship applies when Smith is included in a march gathering Iron.
Players using Smith mainly for economic progression should prioritize his Iron-related Expedition skills rather than investing heavily in combat abilities they rarely use.
Iron Mine Furniture
The Iron Mine contains six furniture pieces:
- Forging Bench
- Mold
- Changing Room
- Garburator
- Coat Rack
- Hydraulic Press
Furniture forms part of the building’s internal progression. When the next Iron Mine level is unavailable despite meeting the Furnace requirement, open the building and inspect its furniture prerequisites.
Best Furniture Upgrade Priority
- Upgrade the exact furniture piece required for the next Iron Mine level.
- Complete inexpensive furniture improvements that support building progression.
- Avoid upgrading every piece evenly when resources are limited.
- Recheck the furniture requirements after each Furnace upgrade.
The Furnace and direct progression buildings should normally receive priority over optional furniture improvements that do not unlock an immediate benefit.
Whiteout Survival Iron Mine Level 1-10 Costs
The construction times below are base values. Research, State bonuses, Alliance Help, pets, Zinman’s skills, and other construction-speed effects may reduce the timers displayed in your city.
| Level | Furnace | Meat | Wood | Coal | Iron | Base time | Power |
|---|---|---|---|---|---|---|---|
| 1 | 5 | – | 30 | – | – | 2 sec | 40 |
| 2 | 5 | – | 45 | – | – | 3 sec | 76 |
| 3 | 5 | – | 200 | – | – | 10 sec | 130 |
| 4 | 5 | – | 450 | 90 | – | 35 sec | 202 |
| 5 | 5 | – | 1.9K | 380 | – | 1m 10s | 310 |
| 6 | 6 | – | 4.8K | 960 | 240 | 2m 20s | 472 |
| 7 | 7 | – | 17K | 3.4K | 865 | 4m 45s | 706 |
| 8 | 8 | – | 31K | 6.3K | 1.5K | 7m 10s | 940 |
| 9 | 9 | – | 65K | 13K | 3.2K | 10m 30s | 1,174 |
| 10 | 10 | – | 110K | 23K | 5.7K | 14m | 1,514 |
Iron Mine Level 11-20 Costs
| Level | Furnace | Meat | Wood | Coal | Iron | Base time | Power |
|---|---|---|---|---|---|---|---|
| 11 | 11 | 110K | 110K | 23K | 5.9K | 18m | 1,854 |
| 12 | 12 | 150K | 150K | 30K | 7.5K | 21m 30s | 2,194 |
| 13 | 13 | 210K | 210K | 42K | 10K | 26m | 2,768 |
| 14 | 14 | 280K | 280K | 56K | 14K | 33m 30s | 3,342 |
| 15 | 15 | 410K | 410K | 83K | 20K | 43m | 3,916 |
| 16 | 16 | 530K | 530K | 100K | 26K | 1h 13m | 4,724 |
| 17 | 17 | 830K | 830K | 160K | 41K | 1h 27m 30s | 5,532 |
| 18 | 18 | 1.1M | 1.1M | 220K | 56K | 1h 45m | 6,340 |
| 19 | 19 | 1.4M | 1.4M | 280K | 70K | 2h 38m | 7,488 |
| 20 | 20 | 1.9M | 1.9M | 300K | 96K | 3h 17m 30s | 8,636 |
Iron Mine Level 21-30 Costs
| Level | Furnace | Meat | Wood | Coal | Iron | Base time | Power |
|---|---|---|---|---|---|---|---|
| 21 | 21 | 2.4M | 2.4M | 490K | 120K | 4h 16m 30s | 9,784 |
| 22 | 22 | 3.2M | 3.2M | 640K | 160K | 6h 25m | 11,506 |
| 23 | 23 | 4M | 4M | 800K | 200K | 8h 59m | 13,228 |
| 24 | 24 | 5.4M | 5.4M | 1M | 270K | 12h 34m 30s | 14,950 |
| 25 | 25 | 7.3M | 7.3M | 1.4M | 360K | 17h 36m 30s | 16,672 |
| 26 | 26 | 9.4M | 9.4M | 1.8M | 470K | 20h 15m | 19,202 |
| 27 | 27 | 13M | 13M | 2.6M | 670K | 1d 18m | 21,732 |
| 28 | 28 | 17M | 17M | 3.5M | 890K | 1d 3h 57m | 24,262 |
| 29 | 29 | 22M | 22M | 4.4M | 1.1M | 1d 8h 8m | 26,792 |
| 30 | 30 | 27M | 27M | 5.4M | 1.3M | 1d 14h 34m | 30,470 |
Approximate Total Cost to Reach Level 30
Several in-game values are displayed using rounded K and M abbreviations. As a result, these totals should be treated as planning estimates.
| Requirement | Approximate total |
|---|---|
| Meat | 117.62M |
| Wood | 117.85M |
| Coal | 23.37M |
| Iron | 5.90M |
| Combined base construction time | Approximately 8 days, 14 hours, and 27 minutes |
Other Ways to Obtain Iron
The Iron Mine provides a useful daily foundation, but later costs require multiple resource sources.
Gather From Abandoned Smelters
Iron nodes on the world map are called Abandoned Smelters. Higher-level nodes contain more resources, while gathering-speed bonuses reduce the time needed to empty them.
Include Smith in the march and send unused marches before going offline.
Complete Iron Mining Research
Iron Mining technologies improve map gathering speed. These upgrades are separate from Iron Output research, which affects city production.
Open Daily Mission Chests
Daily missions regularly provide standard resources and other progression items. Completing the full daily reward track helps reduce Iron shortages without requiring Gems.
Defeat Beasts and Polar Terrors
Beasts and Alliance rallies can provide resource rewards alongside other materials. Their exact drops vary by level and activity.
Participate in Events
Many recurring events place resource boxes or direct resources in early milestone rewards. Prioritize events that also provide speedups, hero materials, or other useful items.
Keep Resource Boxes Unopened
Selectable resource boxes retain flexibility while they remain in the Backpack. Open them only after confirming that Iron is the current bottleneck.
Use the Nomadic Merchant Carefully
The Nomadic Merchant may offer exchanges involving standard resources. Accept favorable trades when you have a large surplus of another resource and an immediate Iron shortage.
Iron Mine vs Other Production Buildings
| Building | Resource | General progression role |
|---|---|---|
| Sawmill | Wood | Primary early construction resource |
| Hunter’s Hut | Meat | Feeds Survivors and supports later upgrade costs |
| Coal Mine | Coal | Important for construction, research, and Furnace progression |
| Iron Mine | Iron | Increasingly important from Furnace Level 5 onward |
A balanced production setup is more useful than maximizing one building while the other resources remain underdeveloped.
Best Iron Mine Upgrade Priority
| Situation | Priority | Recommendation |
|---|---|---|
| Just reached Furnace Level 5 | Very high | Build the Mine and complete Levels 1-5 |
| Iron repeatedly blocks upgrades | High | Upgrade the Mine, research output, and gather Iron |
| Mine is several levels below Furnace | High | Bring it closer to the current Furnace level |
| Construction event is active | Situational | Time a planned upgrade with event milestones |
| Iron inventory is already large | Medium | Prioritize direct Furnace requirements first |
| Saving for a major Furnace upgrade | Low temporarily | Protect the resources needed for the main progression upgrade |
Reaching Level 30 requires millions of resources, research, gathering, long construction queues, heroes, and event participation. Players comparing that progression with an established city may review a wos account for sale, while checking state age, transfer eligibility, Furnace level, heroes, troops, resource inventory, and building development.
Why Am I Always Short on Iron?
| Possible cause | Recommended solution |
|---|---|
| Iron Mine is underleveled | Upgrade it closer to the Furnace level |
| Iron Output research is incomplete | Complete available Economy technologies |
| No gathering marches are used | Send Smith to high-level Abandoned Smelters |
| Too many buildings are upgraded together | Prioritize Furnace requirements and delay optional construction |
| Resource boxes are opened too early | Keep selectable boxes unopened until the bottleneck is known |
| Smith’s skills are undeveloped | Improve Burnished Iron and Craftsmanship when manuals are available |
| Gathering research is missing | Develop Iron Mining technologies |
Free-to-Play Iron Strategy
Free-to-play players can maintain a reliable Iron supply without purchasing standard resources.
- Complete Iron Mine Levels 1-5 immediately after unlocking the building.
- Keep the Mine reasonably close to Furnace progression.
- Research both Iron Output and Iron Mining.
- Develop Smith’s economic skills.
- Send gathering marches before long offline periods.
- Complete daily missions and resource events.
- Save selectable resource boxes until Iron becomes the bottleneck.
- Check the next Furnace cost before upgrading optional buildings.
- Avoid spending Gems on standard Iron except for an unusually valuable milestone.
Passive production provides a dependable base. Meanwhile, gathering and event rewards supply much of the Iron needed for expensive upgrades.
Daily Iron Routine
- Check the Iron required for your next priority upgrade.
- Collect completed city-production resources.
- Confirm that the Iron Mine has active workers.
- Review available Iron Output research.
- Send Smith and unused marches to Abandoned Smelters.
- Complete daily missions and relevant event milestones.
- Keep resource boxes unopened until they are needed.
- Review Furnace requirements before starting optional construction.
Common Iron Mine Mistakes
Leaving the Mine at Level 1
The first five levels are extremely cheap and fast. Complete them shortly after the building unlocks.
Depending Only on Passive Production
Later upgrades require millions of resources. Combine city output with gathering, events, missions, and stored boxes.
Confusing Output With Gathering Speed
Iron Output affects the city building. Iron gathering speed affects marches collecting from map nodes.
Not Using Smith for Iron
Smith provides both Iron Mine output and map gathering bonuses. Include him when gathering Iron.
Spending Iron Before Checking Furnace Costs
The Furnace controls wider city progression. Review its next requirement before beginning optional upgrades.
Opening Every Resource Box Immediately
Unopened boxes retain flexibility and remain easier to protect than exposed resources.
Ignoring Furniture Requirements
A building upgrade may remain locked until the required interior furniture reaches the correct level.
Using Universal Speedups on Early Levels
Opening Iron Mine upgrades take seconds or minutes. Save universal speedups for longer construction, research, or training projects.
FAQ
What does the Iron Mine do in Whiteout Survival?
The Iron Mine produces Iron inside the city. Iron is used for building upgrades, research, troop training, and long-term progression.
When does the Iron Mine unlock?
It unlocks at Furnace Level 5. Iron Mine Levels 1-5 can all be completed while the Furnace remains at Level 5.
What is the maximum Iron Mine level?
The maximum standard Iron Mine level is Level 30.
How do you increase Iron Mine production?
Upgrade the building, maintain active workers, complete Iron Output research, and improve Smith’s Burnished Iron skill.
How do you gather Iron faster?
Include Smith in the gathering march, complete Iron Mining research, use gathering-speed bonuses, and select higher-level Abandoned Smelters.
Which Smith skill increases Iron production?
Burnished Iron increases city Iron Mine output by up to 25%. Craftsmanship separately increases map Iron gathering speed by up to 25%.
How much does Iron Mine Level 30 cost?
The Level 30 upgrade requires approximately 27M Meat, 27M Wood, 5.4M Coal, and 1.3M Iron. Its base construction time is 1 day, 14 hours, and 34 minutes.
How much does it cost to reach Level 30?
Based on the abbreviated values, the approximate total is 117.62M Meat, 117.85M Wood, 23.37M Coal, and 5.90M Iron.
Conclusion
The Whiteout Survival Iron Mine unlocks at Furnace Level 5 and provides passive Iron production through Level 30.
Complete the first five levels early, then keep the building reasonably close to Furnace progression. Iron Output research and Smith’s Burnished Iron skill provide additional passive production.
Because later costs reach millions of resources, city production alone will not be enough. Use Smith for gathering, complete Iron Mining research, participate in events, and keep selectable resource boxes unopened until Iron becomes the current bottleneck.
Finally, review your next Furnace requirement before spending Iron on optional buildings. Careful resource planning prevents one missing material from stopping the entire construction queue.
Explore the Whiteout Survival guide category for more building, resource, hero, troop, event, and progression guides.