Iron is one of the most important resources in Whiteout Survival. You need it for building upgrades, research, troop training, troop healing, and long-term city growth. Once your Furnace level rises, Iron becomes easier to spend than to save, so having a steady supply matters.
The good news is that Iron comes from many different places. Some methods give small daily amounts, while others can provide large boosts when used consistently. This guide explains the best ways to get more Iron in Whiteout Survival and how to manage each source efficiently.
Best Ways to Get Iron in Whiteout Survival
The main ways to get Iron are:
- Iron Mine
- Gathering from Abandoned Smelters
- Alliance Chests
- Beasts and Polar Terrors
- Daily Missions
- Events
- Hero Recruitment
- Pet Adventure
- Nomadic Merchant
- VIP Shop
- In-game Deals
For most players, the best strategy is not to rely on only one source. You should combine passive production, daily tasks, gathering, and event rewards so your Iron income stays consistent.
1. Upgrade Your Iron Mine
Your Iron Mine is the most reliable source of Iron because it produces resources over time. The higher its level, the more Iron it can generate. If your Iron Mine is underleveled, your city will struggle to keep up with upgrade and research costs later.
Make sure your Iron Mine is upgraded whenever possible. Also, keep your worker slots active so production does not stop. This is especially important for free-to-play players because passive income adds up over days and weeks.
Iron Mine Tips
- Upgrade your Iron Mine whenever it becomes available.
- Keep all available worker slots filled.
- Collect Iron regularly so production does not sit idle.
- Prioritize resource production buildings if you often run out of materials.
The Iron Mine will not solve every shortage by itself, but it should be the foundation of your Iron income.
2. Gather Iron from Abandoned Smelters
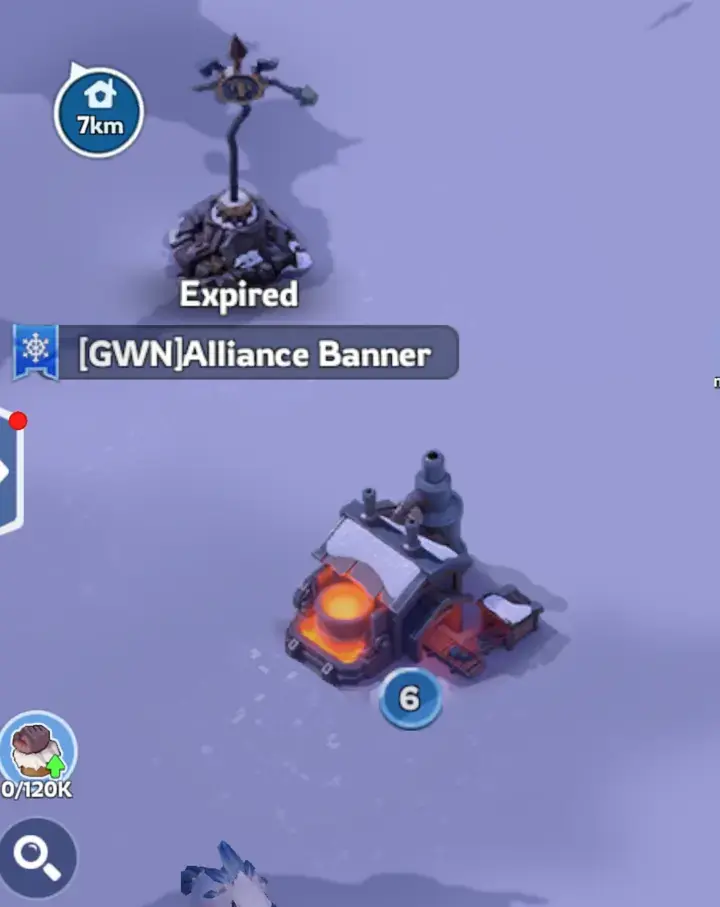
Gathering is one of the best ways to increase your Iron supply, especially when your city is waiting on construction, research, or training timers. On the world map, you can find Abandoned Smelters that contain Iron.
Higher-level Abandoned Smelters usually provide more Iron, so send troops to the highest-level smelters you can safely gather from. If your alliance territory gives better access to stronger resource tiles, use that advantage whenever possible.
Gathering Tips
- Send idle marches to Abandoned Smelters.
- Choose higher-level smelters for better returns.
- Use gathering when you are offline or not actively fighting.
- Avoid letting marches sit unused in your city.
Gathering is not exciting, but it is one of the most dependable ways to build a larger Iron stockpile.
3. Join an Active Alliance for Alliance Chests
An active alliance can help you earn more Iron without requiring constant farming. When alliance members defeat Polar Terrors, players can receive Alliance Chests. These chests often include useful items such as speedups and resources.
Alliance activity can also lead to bigger shared rewards, including Honor Chest progress. If your alliance regularly rallies Polar Terrors and participates in events, you will naturally collect more resource rewards over time.
Alliance Tips
- Join an alliance that actively hunts Polar Terrors.
- Help with rallies when you have stamina available.
- Open Alliance Chests regularly.
- Participate in alliance events for extra rewards.
A quiet alliance will slow your growth. A strong alliance gives you more chests, more help, and better access to event rewards.
4. Defeat Beasts and Polar Terrors
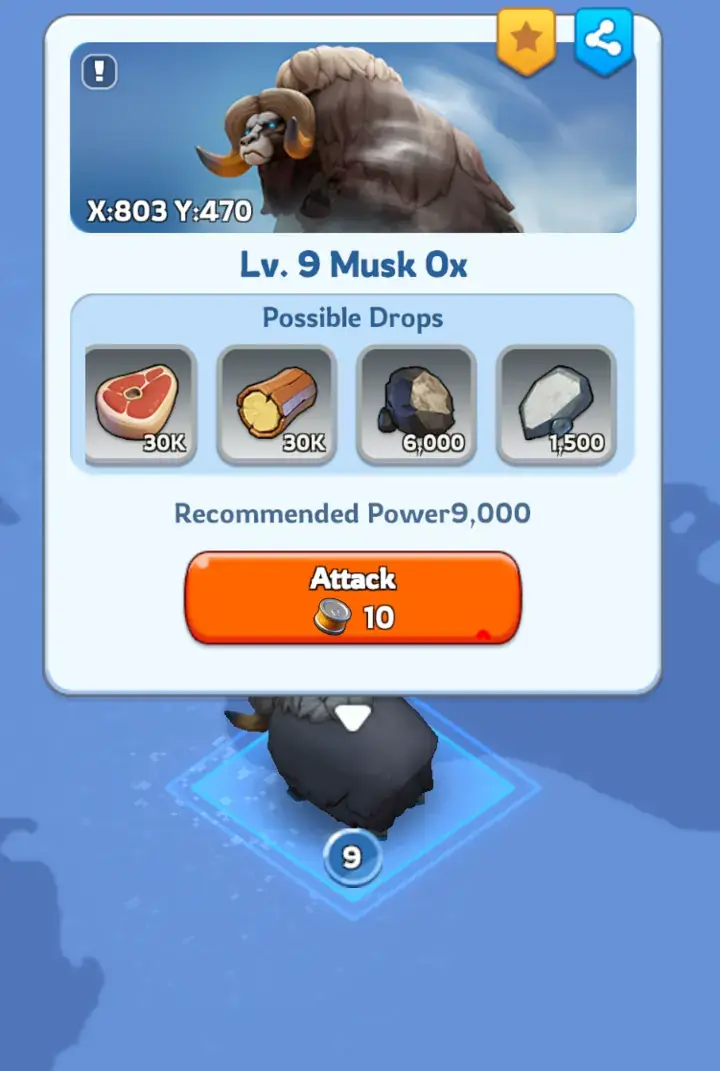
Beasts and Polar Terrors on the world map can reward you with resources, including Iron. Beasts can usually be attacked solo, while Polar Terrors require alliance cooperation.
Higher-level targets give better rewards, but they also require stronger troops and more stamina. If you are trying to farm efficiently, choose targets that your army can defeat without wasting too many resources.
Beast and Polar Terror Tips
- Hunt Beasts when you have spare stamina.
- Join Polar Terror rallies from your alliance.
- Target higher-level enemies when your power allows it.
- Use stamina before it caps so you do not waste potential rewards.
Polar Terrors are especially useful because they support both personal rewards and alliance chest progress.
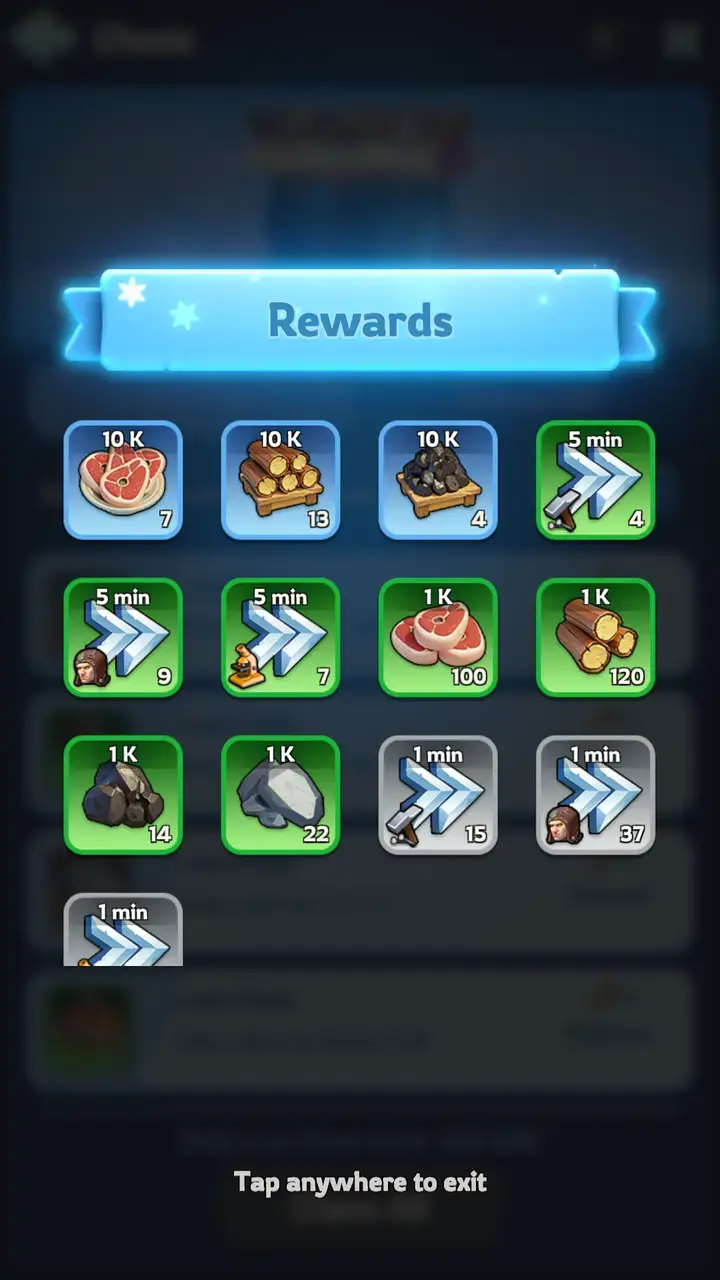
5. Complete Daily Missions
Daily Missions are one of the easiest Iron sources to overlook. By completing your daily task list and opening mission chests, you can earn valuable resources. The later Daily Mission chests are especially useful because they provide better rewards.
Try to complete your Daily Missions every day, even if you only have a short time to play. These rewards are consistent, and consistency is what keeps your city growing.
Daily Mission Tips
- Complete enough tasks to unlock the later chests.
- Prioritize simple tasks such as gathering, training, building, and alliance help.
- Claim every chest before the daily reset.
- Make Daily Missions part of your routine.
Daily Missions are one of the best habits for long-term progress because they provide resources, activity rewards, and steady account growth.
6. Participate in Events
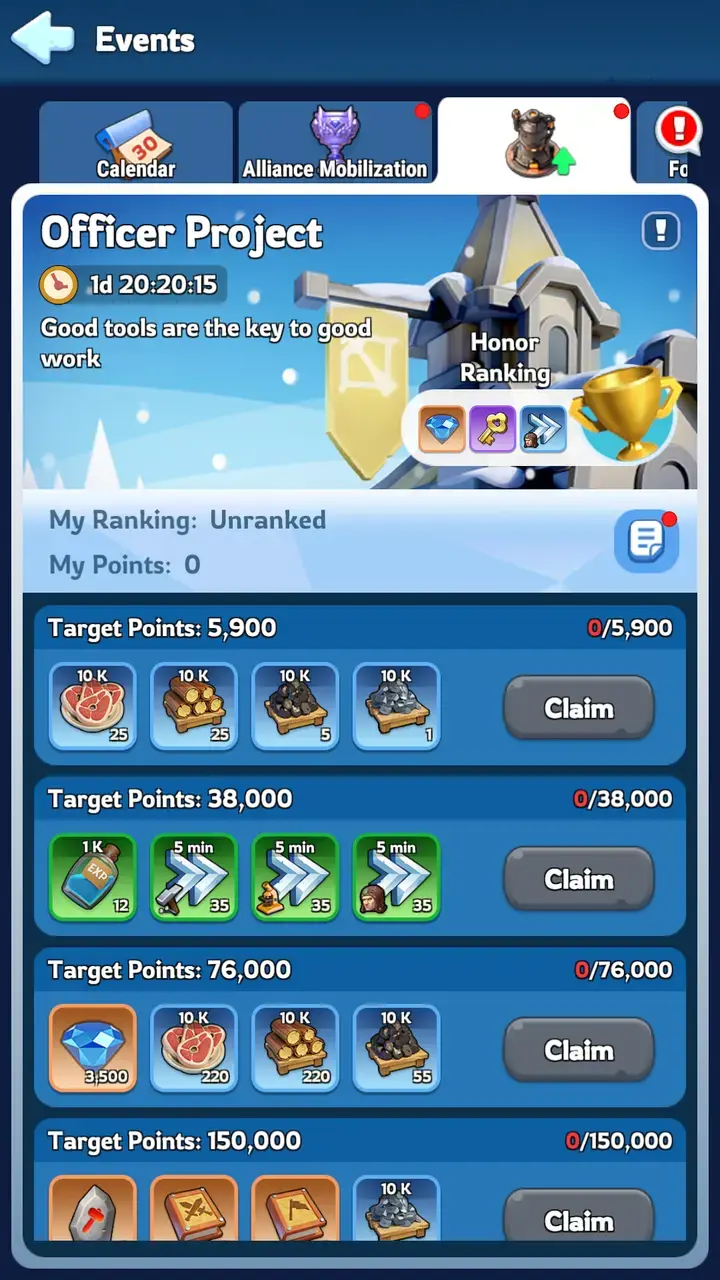
Events are one of the best ways to get large amounts of Iron. Whiteout Survival often runs milestone events where you earn points by upgrading buildings, training troops, researching technology, using speedups, or completing other activities.
Many events give resource rewards at early milestones, which means you do not always need to rank highly to benefit. Even casual participation can help you collect Iron, speedups, and other useful items.
Event Tips
- Check the event tab every day.
- Save some speedups and resources for milestone events.
- Claim milestone rewards as soon as they are available.
- Join alliance-based events when possible.
Events are especially useful because they reward actions you may already be doing. Planning your upgrades around event milestones can make your Iron spending more efficient.
7. Get Iron from Hero Recruitment
Hero Recruitment can sometimes reward Iron. The amount is usually small, so this should not be your main farming method. However, it can still help when you are short by a small amount and need to start an upgrade.
Think of Hero Recruitment Iron as a bonus rather than a reliable income source. You are mainly recruiting for heroes and hero shards, but the extra resources are still useful.
8. Send Pets on Adventures
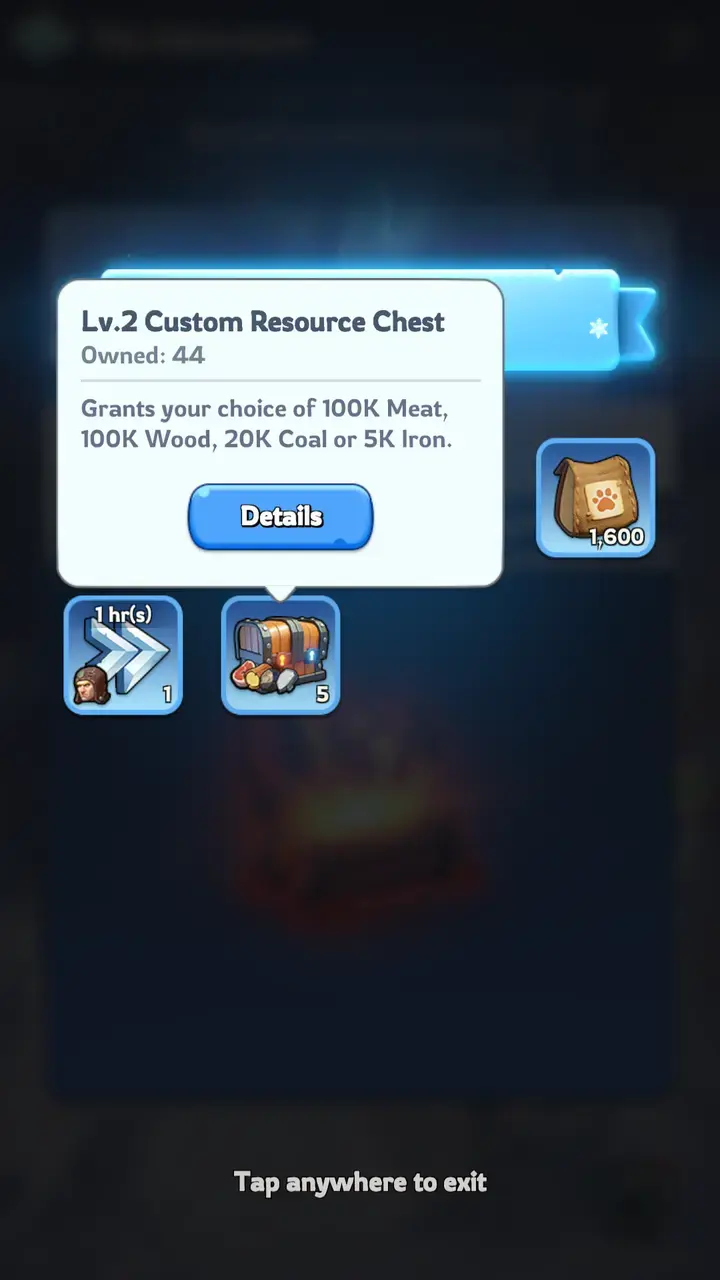
Pet Adventure is another extra source of resources. When pets return from adventures, they can bring back chests and items, including resource chests. These chests may help you gain more Iron when opened.
Like Hero Recruitment, Pet Adventure should be treated as a support method. It will not replace gathering or Daily Missions, but it adds value over time.
Pet Adventure Tips
- Send pets on adventures whenever available.
- Claim adventure rewards regularly.
- Save Custom Resource Chests until you know which resource you need most.
- Use Iron from chests when starting expensive upgrades or research.
Resource chests are flexible, so avoid opening them too early unless you need the Iron immediately.
9. Check the Nomadic Merchant

The Nomadic Merchant can offer Iron through trades and daily deals. Sometimes you can exchange another resource, such as Meat, for Iron. This is useful when you have too much of one resource and not enough Iron.
Check the merchant regularly and look for trades that match your current needs. Refreshes can also help you find better offers, but avoid wasting too many resources chasing small deals.
Nomadic Merchant Tips
- Check the merchant every day.
- Trade surplus resources for Iron when the exchange is worth it.
- Use refreshes carefully.
- Prioritize deals that help you start important upgrades.
The Nomadic Merchant is a good way to balance your resources when one material becomes a bottleneck.
10. Use the VIP Shop When Needed
The VIP Shop can provide Iron in exchange for gems. This is helpful when you are only missing a small amount and want to start an upgrade, research, or troop training immediately.
However, gems are valuable, so do not spend them on Iron too often. Use the VIP Shop as a backup option, not your main farming method.
VIP Shop Tips
- Use it when you need a quick Iron boost.
- Avoid spending gems if you can gather or claim rewards instead.
- Check weekly limits and shop resets.
- Save gems for higher-value purchases when possible.
The VIP Shop is convenient, but free methods are usually better for long-term resource management.
11. Consider In-Game Deals Carefully
In-game deals can include Iron and other resources. This is the fastest way to gain resources, but it requires spending money. For free-to-play or low-spend players, it is better to focus on mines, gathering, missions, events, and alliance rewards first.
If you do buy packs, choose ones that give value beyond Iron alone, such as speedups, stamina, or event-related items. Iron can be farmed, so avoid buying it unless it helps you reach a specific goal.
Iron Source Comparison
| Iron Source | Effort Needed | Reward Potential | Best For |
|---|---|---|---|
| Iron Mine | Low | Steady | Passive income |
| Gathering | Medium | Good | Daily farming |
| Alliance Chests | Low to Medium | Good | Active alliance players |
| Beasts | Medium | Moderate | Using spare stamina |
| Polar Terrors | Medium | Good | Alliance rallies |
| Daily Missions | Medium | Very Good | Consistent daily rewards |
| Events | Medium | High | Planned upgrades and milestones |
| Hero Recruitment | Low | Low | Bonus resources |
| Pet Adventure | Low | Low to Moderate | Extra resource chests |
| Nomadic Merchant | Low | Moderate | Resource balancing |
| VIP Shop | Low | Moderate | Quick emergency Iron |
| Deals | Low | High | Spending players |
Best Iron Strategy for Beginners
If you are still early in Whiteout Survival, focus on simple and consistent methods first:
- Upgrade your Iron Mine.
- Complete Daily Missions every day.
- Send troops to gather from Abandoned Smelters.
- Join an active alliance.
- Participate in easy event milestones.
- Save resource chests until you need Iron.
This approach gives you steady progress without wasting gems or relying on paid packs.
Best Iron Strategy for Mid-Game and Late-Game Players
As your city grows, Iron costs become much higher. At this stage, you need to plan your spending more carefully.
Try to time expensive upgrades with events so you receive milestone rewards while spending resources. Use gathering marches often, join alliance rallies, and avoid opening Custom Resource Chests until you know exactly which resource is blocking your progress.
Mid-game and late-game players should also keep a stronger reserve of Iron before major building upgrades, research pushes, or troop training events.
Common Mistakes to Avoid
Many players run out of Iron because they spend it without planning. Avoid these mistakes:
- Ignoring your Iron Mine upgrades.
- Leaving marches idle instead of gathering.
- Missing Daily Mission chests.
- Staying in an inactive alliance.
- Opening resource chests too early.
- Spending gems on Iron when free sources are available.
- Starting upgrades outside of events when you could earn extra rewards.
Small habits make a big difference. If you gather daily, complete missions, and join events, your Iron supply will become much easier to manage.
FAQs
What is Iron used for in Whiteout Survival?
Iron is used for city development, including building upgrades, research, troop training, and healing. It becomes more important as your city grows and upgrade costs increase.
What is the fastest free way to get Iron?
The fastest free methods are completing Daily Missions, gathering from Abandoned Smelters, joining alliance rallies, and claiming event milestone rewards.
Should I spend gems on Iron?
You can spend gems on Iron through the VIP Shop, but it is better to use this only when you need a small amount quickly. For regular farming, gathering, missions, events, and alliance rewards are better options.
Is gathering Iron worth it?
Yes. Gathering from Abandoned Smelters is one of the most reliable ways to get Iron, especially when your troops would otherwise be idle.
Why do I keep running out of Iron?
You may be upgrading too quickly, missing Daily Missions, not gathering enough, or opening resource chests before you really need them. Joining a more active alliance can also improve your resource income.
Conclusion
Getting more Iron in Whiteout Survival is all about building consistent habits. Upgrade your Iron Mine, gather from Abandoned Smelters, complete Daily Missions, join an active alliance, and take advantage of event rewards whenever they appear. Over time, these methods will give your city a much stronger resource foundation.
For more helpful tips, event explanations, and progression guides, explore our Whiteout Survival guides.