
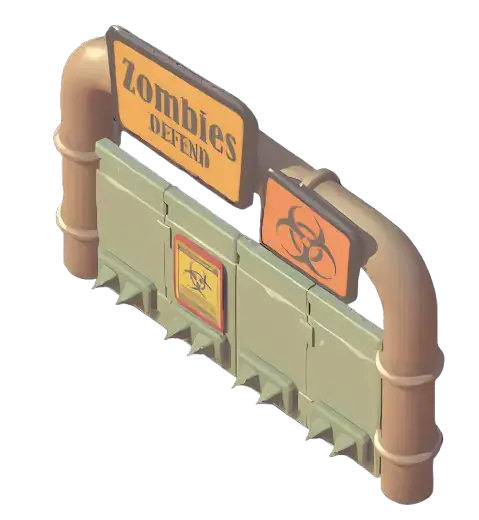
 The Wall in Last War: Survival affects how quickly your base loses durability while burning and how quickly that durability recovers. It also lets you select up to five squads for base defense and repeatedly appears as a requirement for Headquarters progression.
Upgrading the Wall gives +1 percentage point per level to both listed durability bonuses, reaching 30% at level 30 and 35% at level 35. However, a high Wall level does not by itself make your defending squads strong. Hero development, troop tier, research, gear, Drone progression, Hospital capacity, and your decision to keep troops on or off the Wall matter much more in an actual PvP battle.
The Wall in Last War: Survival affects how quickly your base loses durability while burning and how quickly that durability recovers. It also lets you select up to five squads for base defense and repeatedly appears as a requirement for Headquarters progression.
Upgrading the Wall gives +1 percentage point per level to both listed durability bonuses, reaching 30% at level 30 and 35% at level 35. However, a high Wall level does not by itself make your defending squads strong. Hero development, troop tier, research, gear, Drone progression, Hospital capacity, and your decision to keep troops on or off the Wall matter much more in an actual PvP battle.
★Quick Take: Upgrade the Wall first when it blocks your next Headquarters level. For PvP, enable defending squads only when you have a realistic chance of winning or trading efficiently. Against an overwhelmingly stronger attacker, removing squads can limit combat losses, but an empty Wall does not guarantee zero troop losses if the base is breached.
What Does the Wall Do in Last War?
The Wall has two separate roles that are easy to confuse: building progression and base defense. As a building, each Wall level increases Power and improves two durability-related effects:- Slower durability loss when burning: reduces how quickly base durability drains while your base is on fire.
- Faster durability restoration: increases the recovery rate after durability has been lost.
Should You Put Troops on the Wall?
Sometimes. There is no single Wall-defense setting that is best for every situation. Putting troops on the Wall allows your squads to fight the attacker. That can be useful when you are strong enough to win, discourage repeated hits, protect an important position, or make good use of alliance reinforcements. The downside is that your defending troops participate in the battle and can become wounded or be lost. If you repeatedly defend against a player far stronger than you, several enabled squads can create a much larger recovery problem than the Wall itself solves.When to Keep Troops on the Wall
- The attacker is weaker or close enough in strength that you can realistically defend.
- Your strongest squad has competitive heroes, troops, research, gear, and Drone progression.
- Your Hospital has enough capacity for expected wounded troops.
- You are online and can react if the first defense goes badly.
- Alliance members can reinforce you before the attack arrives.
- You specifically need to defend your base or position rather than simply minimize losses.
When to Remove Squads From Wall Defense
- A much stronger player or rally is likely to defeat every squad you can field.
- Your Hospital is already close to capacity.
- You will be offline during a dangerous PvP window.
- Your weaker second, third, or later squads would only provide easy additional casualties.
- You are trying to reduce the number of troops exposed to repeated base attacks.
!Important: Turning off Wall defense is a loss-control tactic, not complete protection. A successful base breach can still have consequences even when no squad is selected. If you cannot safely defend during a major PvP period, a shield or timely relocation is more reliable than assuming an empty Wall makes your troops completely safe.
Should You Use All Five Wall Squads?
Usually not automatically. The fact that the Wall can hold up to five squads does not mean every unlocked formation should defend every attack. Your strongest squad may be able to compete with an incoming attacker while your later squads are dramatically weaker. Enabling all of them can expose more troops without meaningfully improving the outcome. A better approach is to judge each formation separately:- Main squad: usually your best defensive option when you intend to fight.
- Second squad: add it only if it is sufficiently developed to contribute.
- Later squads: avoid enabling them merely because the slots are available if they are far behind in heroes or troop quality.
Last War Wall Upgrade Costs and Levels 1–35
Wall upgrades require Iron and Food during early progression, with Coins added from level 9. Levels 31–35 require Oil after your warzone reaches the relevant Age of Oil progression and HQ Expansion research is completed. Every level also raises the two displayed Wall bonuses by one percentage point. Level 10 provides 10% slower durability loss and 10% faster restoration; level 30 provides 30% of each; and level 35 provides 35%.| Level |  Iron
Iron |
 Food
Food |
 Coin
Coin |
Oil | Upgrade Time | Power | Slower Durability Loss When Burning | Faster Durability Restoration |
|---|---|---|---|---|---|---|---|---|
| 1 | – | – | – | – | – | 600 | 1% | 1% |
| 2 | 68 | 23 | – | – | 4s | 1,200 | 2% | 2% |
| 3 | 1,000 | 340 | – | – | 47s | 1,800 | 3% | 3% |
| 4 | 2,500 | 840 | – | – | 1m 57s | 2,400 | 4% | 4% |
| 5 | 20,000 | 6,800 | – | – | 11m 42s | 3,000 | 5% | 5% |
| 6 | 91,000 | 30,000 | – | – | 35m 6s | 3,600 | 6% | 6% |
| 7 | 240,000 | 81,000 | – | – | 1h 33m 36s | 4,200 | 7% | 7% |
| 8 | 390,000 | 130,000 | – | – | 3h 7m 12s | 5,000 | 8% | 8% |
| 9 | 620,000 | 210,000 | 130,000 | – | 4h 22m 5s | 6,100 | 9% | 9% |
| 10 | 750,000 | 250,000 | 160,000 | – | 5h 32m 25s | 7,300 | 10% | 10% |
| 11 | 1,900,000 | 620,000 | 400,000 | – | 6h 33m 43s | 9,100 | 11% | 11% |
| 12 | 3,200,000 | 1,100,000 | 680,000 | – | 9h 21m 46s | 11,500 | 12% | 12% |
| 13 | 3,500,000 | 1,200,000 | 740,000 | – | 1d 12h 10m 17s | 14,000 | 13% | 13% |
| 14 | 4,900,000 | 1,600,000 | 1,000,000 | – | 1d 15h 49m 22s | 16,900 | 14% | 14% |
| 15 | 6,800,000 | 2,300,000 | 1,500,000 | – | 1d 21h 7m 18s | 20,400 | 15% | 15% |
| 16 | 12,000,000 | 4,100,000 | 2,600,000 | – | 2d 5h 34m 12s | 25,000 | 16% | 16% |
| 17 | 16,000,000 | 5,300,000 | 3,400,000 | – | 2d 17h 23m 52s | 30,200 | 17% | 17% |
| 18 | 28,000,000 | 9,200,000 | 5,900,000 | – | 3d 5h 57m 25s | 37,100 | 18% | 18% |
| 19 | 33,000,000 | 11,000,000 | 7,100,000 | – | 4d 5h 32m | 44,600 | 19% | 19% |
| 20 | 60,000,000 | 20,000,000 | 13,000,000 | – | 5d 12h 32m 48s | 54,700 | 20% | 20% |
| 21 | 84,000,000 | 28,000,000 | 18,000,000 | – | 6d 21h 6m 38s | 66,700 | 21% | 21% |
| 22 | 110,000,000 | 36,000,000 | 23,000,000 | – | 8d 15h 26m 37s | 80,300 | 22% | 22% |
| 23 | 140,000,000 | 45,000,000 | 29,000,000 | – | 9d 4h 31m 52s | 95,600 | 23% | 23% |
| 24 | 170,000,000 | 57,000,000 | 36,000,000 | – | 10d 15h 51m 8s | 112,600 | 24% | 24% |
| 25 | 290,000,000 | 96,000,000 | 62,000,000 | – | 13d 14h 12m 26s | 134,800 | 25% | 25% |
| 26 | 400,000,000 | 130,000,000 | 86,000,000 | – | 18d 15h 5m 24s | 160,800 | 26% | 26% |
| 27 | 530,000,000 | 180,000,000 | 110,000,000 | – | 25d 16h 19m 34s | 190,700 | 27% | 27% |
| 28 | 740,000,000 | 250,000,000 | 160,000,000 | – | 34d 8h 31m 3s | 226,200 | 28% | 28% |
| 29 | 1,000,000,000 | 340,000,000 | 220,000,000 | – | 44d 46m 33s | 267,600 | 29% | 29% |
| 30 | 1,400,000,000 | 480,000,000 | 310,000,000 | – | 57d 14h 30m 6s | 316,600 | 30% | 30% |
| 31 | 1,600,000,000 | 530,000,000 | 340,000,000 | 675,000 | – | 368,600 | 31% | 31% |
| 32 | 1,700,000,000 | 580,000,000 | 370,000,000 | 1,080,000 | – | 422,500 | 32% | 32% |
| 33 | 1,900,000,000 | 640,000,000 | 410,000,000 | 1,836,000 | – | 479,300 | 33% | 33% |
| 34 | 2,000,000,000 | 670,000,000 | 430,000,000 | 3,304,800 | – | 537,500 | 34% | 34% |
| 35 | 2,100,000,000 | 710,000,000 | 450,000,000 | 6,609,600 | – | 597,200 | 35% | 35% |
Wall Levels Required for Headquarters Upgrades
The Wall is not merely an optional defensive investment. It repeatedly becomes a mandatory prerequisite on the Headquarters upgrade path.| Headquarters Target | Required Wall Level |
|---|---|
| HQ3 | Wall 2 |
| HQ5 | Wall 4 |
| HQ6 | Wall 5 |
| HQ7 | Wall 6 |
| HQ11 | Wall 10 |
| HQ15 | Wall 14 |
| HQ19 | Wall 18 |
| HQ23 | Wall 22 |
| HQ27 | Wall 26 |
| HQ32 | Wall 31 |
| HQ34 | Wall 33 |
✓Recommendation: Check your next one or two Headquarters requirements before using a builder. If a Wall checkpoint is approaching—especially Wall 18, 22, 26, 31, or 33—start it early enough that the long construction timer does not stall your HQ push.
Is the Wall Worth Upgrading Beyond HQ Requirements?
Yes, but it is usually a secondary priority when it is not blocking Headquarters progression. The defensive bonuses are permanent, and players exposed to frequent base attacks benefit more from slower durability loss and faster recovery. However, high-level Wall upgrades become extremely expensive while providing a predictable one-percentage-point increase to each durability stat. For example, level 30 requires 1.4 billion Iron, 480 million Food, and 310 million Coins at the listed reference values. If that upgrade is not currently required for Headquarters progression, compare its defensive value against a Tech Center, troop building, Hospital, or main military center that may provide a more immediate combat or development benefit.Best Priority for F2P Players
F2P and low-spending players should generally keep the Wall on the required HQ path rather than trying to max it ahead of everything else. The resources tied up in an optional high-level Wall upgrade can delay troop tiers, research, hero-level-cap progression, and other major account improvements.Higher-Spending and PvP-Focused Players
Players with deeper resource and speedup reserves can justify keeping the Wall closer to maximum, particularly if they frequently hold contested positions or expect repeated base attacks. Players who prefer to begin with more advanced permanent progression can optionally compare Last War accounts for sale. When evaluating an account, check HQ level, heroes, research, troop tier, Hospital capacity, Wall progression, gear, and Drone strength rather than focusing on the Wall alone.Wall Levels 31–35 and Age of Oil
After Season 2, the later Age of Oil progression opens the path beyond level 30. Completing the required HQ Expansion research allows the Headquarters and eligible permanent buildings, including the Wall, to progress toward level 35. Wall upgrades from 31 onward add Oil to the normal Iron, Food, and Coin costs:- Wall 31: 675,000 Oil
- Wall 32: 1,080,000 Oil
- Wall 33: 1,836,000 Oil
- Wall 34: 3,304,800 Oil
- Wall 35: 6,609,600 Oil
How Wall Durability Works
The Wall’s building bonuses revolve around burning durability loss and durability restoration. When your base is attacked successfully and enters a burning state, its durability can continue to decline. A higher Wall level slows that loss. Afterward, the restoration bonus helps durability recover faster. The bonuses scale consistently with building level:- Wall 10: 10% slower burning durability loss and 10% faster restoration
- Wall 20: 20% and 20%
- Wall 30: 30% and 30%
- Wall 35: 35% and 35%
How to Build a Better Wall Defense
Use Your Strongest Appropriate Squad
If you intend to defend, start with the formation that gives you the best realistic chance of winning. Avoid automatically adding weak secondary squads simply to fill all available Wall slots. The Last War Troop Stats guide explains how troop tier, March Size, Morale, Attack, HP, and Defense contribute to combat performance.Watch Hospital Capacity
A successful defensive strategy still creates wounded troops. Check Hospital capacity before major PvP periods and avoid repeatedly exposing squads once that capacity is close to full. The Last War Hospital guide covers capacity, healing, and why Hospital planning becomes increasingly important during sustained fighting.Use Alliance Reinforcements Intentionally
If your alliance expects an attack, organize reinforcements before it lands. A reinforced base is very different from a player attempting to hold against a stronger attacker alone.React to Incoming Attacks
Do not treat Wall defense as a permanent set-and-forget configuration. If an incoming march is clearly beyond your ability to defend, changing the lineup before impact can prevent unnecessary exposure. The Last War Alert Tower guide explains how incoming-attack information can help you decide whether to defend, reinforce, shield, or move.Wall Defense vs. an Overwhelming Attacker
This is where many players make their most expensive mistake. If a stronger attacker can defeat your first squad easily, allowing multiple weaker squads to defend afterward rarely improves the situation. Instead, each enabled formation exposes additional troops to battle. Against a player you cannot realistically stop:- Review the incoming attack and compare squad strength.
- Remove weak Wall formations if defending is clearly hopeless.
- Use a shield or relocate when possible rather than relying only on an empty Wall.
- Spend or protect excess resources before dangerous PvP periods.
- Keep Hospital capacity available in case troops are still wounded in other fights.
Common Last War Wall Mistakes
- Upgrading too late for an HQ requirement: Wall timers become extremely long, so check upcoming Headquarters prerequisites in advance.
- Putting every squad on the Wall: weak secondary formations may increase losses without improving the result.
- Assuming troops off means zero losses: an undefended base can still be successfully breached.
- Defending a much stronger player repeatedly: review the first report and adjust instead of feeding more troops into the same mismatch.
- Ignoring Hospital capacity: defensive battles become much more expensive when you cannot safely absorb wounded troops.
- Overvaluing Wall Power: displayed building Power does not replace hero, troop, research, gear, or Drone development.
- Rushing Wall 35 unnecessarily: advanced levels consume huge amounts of Oil and core resources, so prioritize mandatory HQ levels first.