Understanding zones in Rise of Kingdoms is one of the most important steps toward building a strong account and joining a powerful alliance. The kingdom map is not just an open field where everyone gathers resources and fights barbarians. It is divided into different zones, and each zone affects your resources, alliance growth, holy site access, pass control, and long-term kingdom politics.
For new governors, zones can feel confusing at first. You start in the outer area of the map, then your alliance slowly pushes toward the center as passes open and stronger alliances begin fighting for control. The deeper you move, the better the rewards become, but the competition also becomes much harder.
This Rise of Kingdoms zones guide explains how Zone 1, Zone 2, and Zone 3 work, why they matter, and how your alliance should plan its expansion.
What Are Zones in Rise of Kingdoms? 🗺️
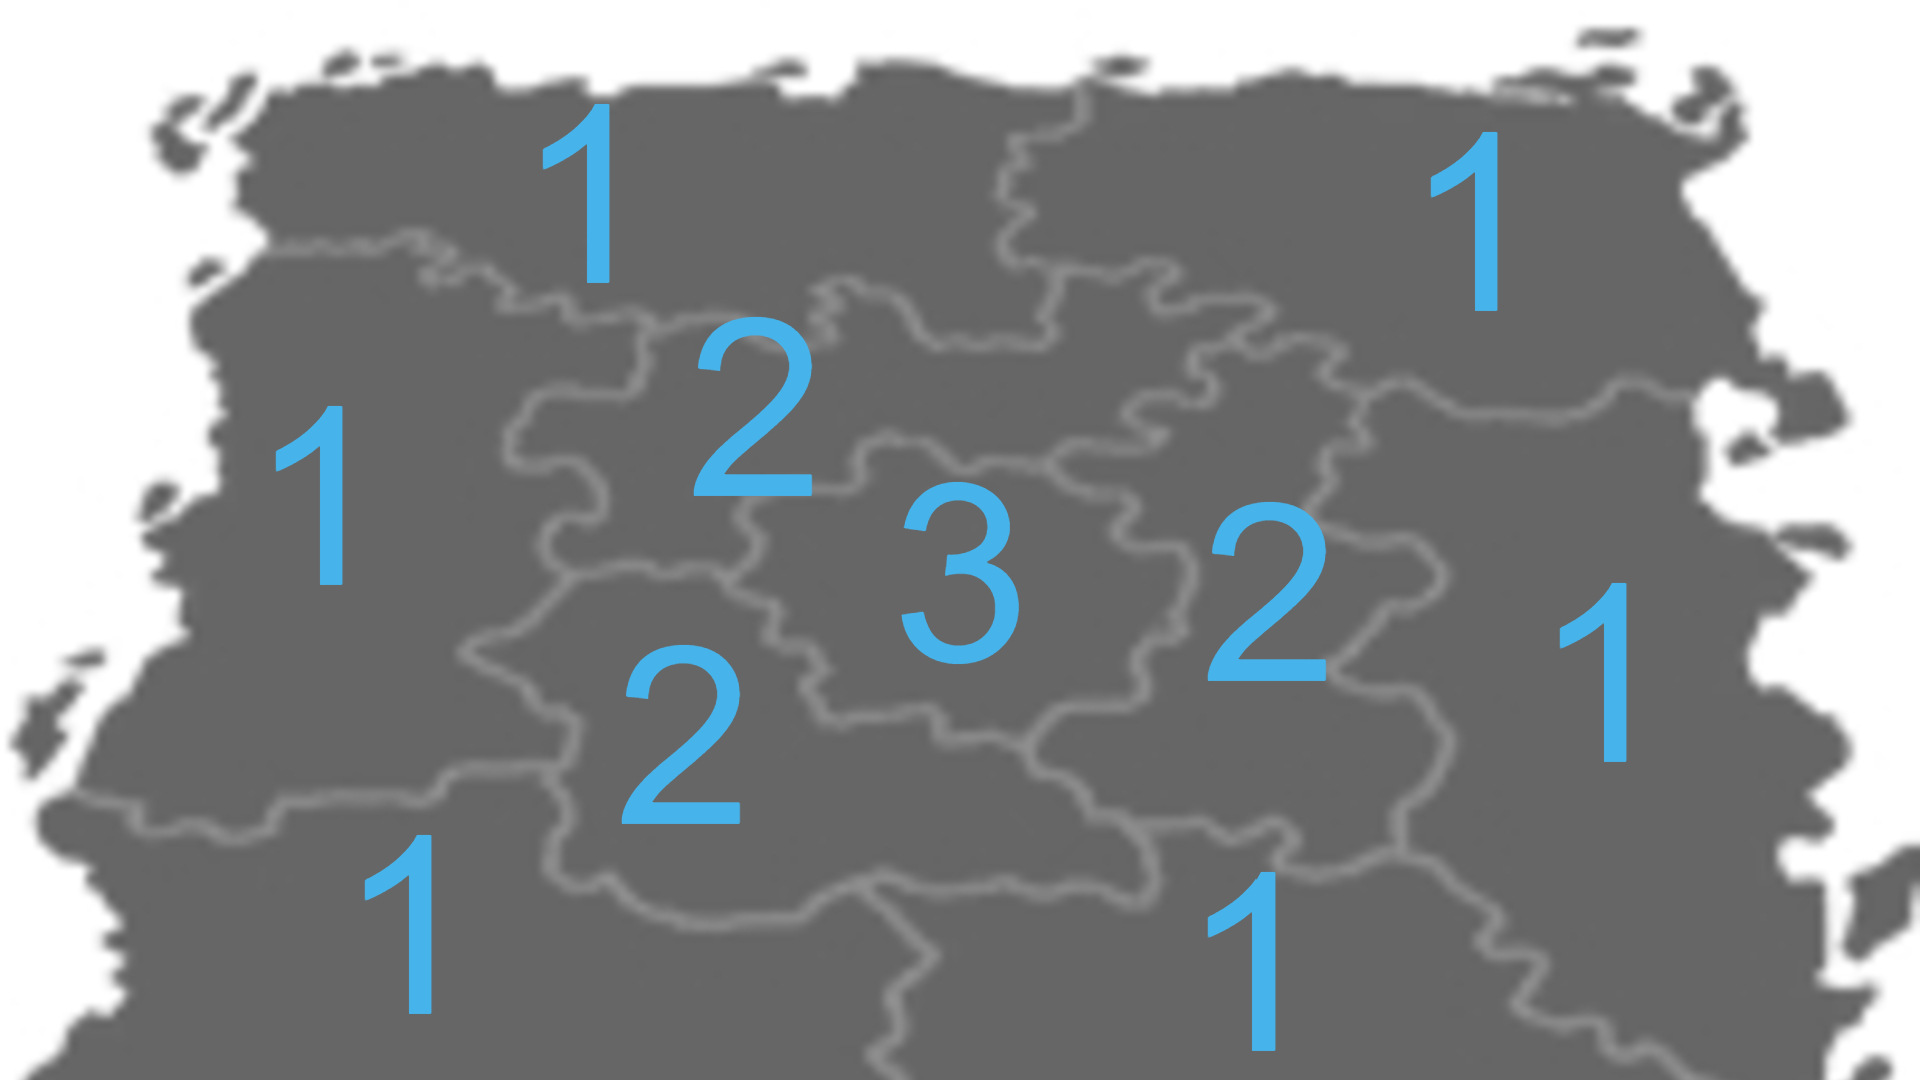
Zones are sections of the kingdom map that separate early-game, mid-game, and high-value territory. Most players refer to them as Zone 1, Zone 2, and Zone 3.
Zone 1 is the outer area where new players begin. Zone 2 sits closer to the center and contains stronger objectives. Zone 3 is the central area of the kingdom and is usually the most contested because it contains the Lost Temple.
Each zone has a different level of importance. As you move inward, you will usually find better resources, stronger barbarians, more valuable holy sites, and more strategic fighting positions. This is why top alliances do not only focus on power. They focus on territory control, pass timing, and map positioning.
Why Zones Matter So Much ⚔️
Zones decide how fast your alliance can grow and how much influence it can have in the kingdom. A strong alliance with poor map control can still fall behind, while a well-organized alliance with smart territory planning can secure better resources and key structures before enemies do.
Zones matter because they affect:
- Access to better resource points
- Alliance territory expansion
- Holy site control
- Pass control between regions
- War positioning
- Kingdom leadership opportunities
- Long-term KvK preparation
In simple terms, the alliance that controls the right zones controls the future of the kingdom. This is why serious alliances plan their territory path from the first few days of a new kingdom.
Zone 1: The Starting Area for New Governors 🌱
Zone 1 is where most governors begin their journey. It is the safest and most beginner-friendly part of the map. You will find lower-level barbarians, easier resource points, and enough space for early alliances to build flags, capture basic holy sites, and grow without constant pressure from the strongest players.
This zone is perfect for learning the game. You can practice gathering, defeating barbarians, joining rallies, scouting caves, discovering villages, and helping your alliance expand territory.
For new players, Zone 1 should not be rushed. The goal is to build a solid foundation before moving deeper into the kingdom. Focus on upgrading your City Hall, training troops, improving your commanders, researching economic and military technologies, and joining an active alliance.
Zone 1 is also important for alliance development. Alliances can use this area to build their first fortress, connect territory, claim alliance resource points, and contest early holy sites. A strong start in Zone 1 often decides which alliances will be ready to compete for Zone 2 later.
What to Focus on Before Leaving Zone 1 🏗️
Before your alliance pushes toward Zone 2, make sure your members are prepared. Moving too early can create problems, especially if your alliance cannot defend territory or support rallies.
Your alliance should focus on:
- Building a clean flag path toward important passes
- Capturing nearby Sanctums and Altars when possible
- Keeping active members near alliance territory
- Training enough troops for rallies and defense
- Preparing resources for healing
- Coordinating with allies or coalition partners
- Avoiding unnecessary civil war too early
Individual players should also prepare before moving forward. Try to have reliable gathering commanders, at least one decent combat march, enough speedups for key upgrades, and enough resources to help during alliance events or pass fights.
Zone 1 is not only a beginner zone. It is the foundation of your alliance’s entire map strategy.
Zone 2: The First Major Step Up 🚪

Zone 2 is where Rise of Kingdoms starts to become more competitive. This area gives alliances access to stronger objectives and better positioning. It is also where many kingdoms begin to form clear power groups, coalitions, and rivalries.
To enter Zone 2, your alliance usually needs access through the proper pass or needs connected alliance territory inside the area. Because of this, passes become extremely important. A pass is not just a doorway. It is a strategic choke point that can decide whether an alliance can expand, defend, or pressure enemies.
Zone 2 usually offers better opportunities than Zone 1. You can expect stronger resource points, higher-value map control, and more important holy sites. This makes Zone 2 a major target for ambitious alliances.
However, Zone 2 is also where weak planning gets punished. If your alliance stretches flags too far, ignores defense, or enters without enough active fighters, stronger alliances can cut your territory and trap your members outside important areas.
Zone 2 Strategy for Alliances 🛡️
A good Zone 2 strategy starts before the pass opens. Alliances should already know which pass they want, who will rally, who will reinforce, and where members should teleport.
Your alliance should avoid random expansion. Instead, build territory with a purpose. Connect to passes, holy sites, alliance resource points, and defensive areas. Make sure flags are not too exposed and that members are online when important structures open.
During Zone 2 competition, communication matters more than individual power. Even a powerful alliance can lose control if members are scattered, rallies are late, or reinforcements are missing.
A strong Zone 2 alliance usually has:
- Clear leadership instructions
- Organized pass rally teams
- Active territory builders
- Members ready to teleport
- Backup flags and defensive plans
- Diplomacy with nearby alliances
- Enough resources for healing after fights
Zone 2 is often where future kingdom leadership starts to become visible. Alliances that perform well here usually become serious contenders for Zone 3.
Zone 3: The Center of Power 👑
Zone 3 is the central area of the kingdom and the most important zone on the map. This is where the Lost Temple is located, making it the ultimate objective for top alliances.
Unlike Zone 1, where players are mostly growing, and Zone 2, where alliances are proving themselves, Zone 3 is about control. The strongest alliances and coalitions fight to enter, hold territory, and secure the path toward the Lost Temple.
Zone 3 is not only valuable because of its location. It is valuable because controlling the center gives an alliance influence over the entire kingdom. Whoever controls the Lost Temple gains access to kingdom leadership, which can affect titles, buffs, rewards, and overall kingdom organization.
Because of this, Zone 3 fights can become intense. Alliances need strong rally leaders, strong garrisons, active players, and good diplomacy. Poor coordination can lead to heavy losses, especially when multiple alliances fight around the same passes and structures.
Why the Lost Temple Is So Important 🏛️
The Lost Temple is the main objective in the center of the kingdom. The alliance that controls it gains a major political advantage because its leader becomes king.
This matters because kingdom leadership affects more than prestige. A good king can organize buffs, titles, kingdom rules, and preparation for future KvK. A bad or disorganized leadership group can create internal conflict that hurts the kingdom later.
That is why many kingdoms try to settle leadership through diplomacy before Zone 3 becomes a complete civil war. In some kingdoms, the strongest coalition takes the temple. In others, several alliances rotate rewards or negotiate control to keep the kingdom stable.
For individual players, the Lost Temple fight is also a major milestone. It is often one of the first times new governors experience large-scale kingdom warfare.
How Passes Control Zone Movement 🚧
Passes are the gates between zones. They decide which alliances can move from one area of the map to another. Without pass control, your alliance may be blocked from entering key territory, even if your members are strong.
This is why pass openings are some of the most important moments in a young kingdom. Alliances prepare rallies, reinforce structures, teleport members, and sometimes fight for hours to secure access.
When your alliance controls a pass, it gains a strategic advantage. Members can move through connected areas, territory can expand, and enemies may be blocked from entering. When your alliance loses a pass, it can lose access to important objectives or become trapped in a weaker position.
For alliance leaders, pass control should always be part of the main strategy. Never treat passes as optional targets.
Best Tips for Controlling Zones 🎯
The best zone strategy is not always about fighting everyone. Smart alliances know when to fight, when to negotiate, and when to focus on growth.
Here are practical tips for better zone control:
- Join an active alliance early
- Follow alliance markers and mails
- Teleport near important territory before major fights
- Save resources for healing
- Do not attack randomly during diplomacy
- Help build flags and alliance structures
- Scout enemy positioning before big battles
- Keep gatherers away from war zones
- Reinforce rallies and garrisons when ordered
- Work with your coalition instead of acting alone
Rise of Kingdoms is a team strategy game. One strong player can help, but one organized alliance can control the map.
Common Zone Mistakes to Avoid ⚠️
Many players lose progress because they do not understand zone timing and alliance territory. Avoid these mistakes if you want smoother growth.
The first mistake is staying in a dead alliance. If your alliance is inactive, has no territory plan, and does not contest objectives, you will fall behind. It is better to join an active alliance that communicates and participates in map events.
The second mistake is teleporting too far from alliance territory. If you are not near your alliance, you may miss rallies, struggle to reinforce, and become an easy target during war.
The third mistake is ignoring passes. Passes decide movement. If your alliance loses important passes, your map options become limited.
The fourth mistake is fighting too early without resources. Healing troops can be expensive, especially during large wars. Always keep backup resources before joining major fights.
The fifth mistake is thinking Zone 3 is only for whales. Strong spenders matter, but activity, coordination, and diplomacy are just as important. Even free-to-play and low-spender players can contribute through reinforcement, field fighting, gathering, scouting, and flag building.
Zone 1 vs Zone 2 vs Zone 3 🔥
Zone 1 is best for early growth, learning the game, farming resources, and building alliance foundations. It is the safest area and the best place for new players to develop.
Zone 2 is the transition into serious alliance competition. It has stronger objectives, better positioning, and more pressure from rival alliances.
Zone 3 is the center of kingdom power. It contains the Lost Temple and usually becomes the main battlefield for top alliances and coalitions.
Each zone has a purpose. The best players understand when to grow, when to move, and when to fight.
FAQs
What are zones in Rise of Kingdoms?
Zones are different sections of the kingdom map. Players usually call them Zone 1, Zone 2, and Zone 3. Each zone has different levels of resources, barbarians, holy sites, and strategic value.
How do I move to another zone?
You usually need your alliance to control the correct pass or have alliance territory in the target zone. Once your alliance has access, you can move through connected territory or teleport to eligible alliance land.
Is Zone 2 better than Zone 1?
Zone 2 is generally more valuable because it gives access to stronger objectives and better map positioning. However, it is also more competitive, so your alliance should be prepared before entering.
Why is Zone 3 important?
Zone 3 is important because it is the center of the kingdom and contains the Lost Temple. Controlling the Lost Temple gives an alliance major political influence over the kingdom.
Should beginners rush to Zone 3?
No. Beginners should focus on growth first. Zone 3 is usually controlled by the strongest alliances, so you should build troops, improve commanders, and follow your alliance strategy before joining major center-map wars.
Conclusion
Zones are one of the most important parts of Rise of Kingdoms strategy. Zone 1 helps you build your foundation, Zone 2 introduces serious alliance competition, and Zone 3 decides who controls the heart of the kingdom.
If you want to grow faster, do not only focus on your own city. Pay attention to your alliance territory, pass control, holy sites, and kingdom politics. The players who understand the map will always have an advantage over those who only chase power numbers.
For more strategy breakdowns, commander tips, and beginner-friendly guides, check out our latest Rise of Kingdoms guides and keep improving your kingdom gameplay.