
 Blizzard Brawl is a solo real-time PvP event in Kingshot where 10 Governors compete for the highest individual Blizzard Point score. Winning fights helps, but combat is only part of the event. Buildings, supply crates, and tactical airdrop items are the main objectives, making efficient movement and objective control more important than simply attacking every opponent you see.
A successful match is usually built around three priorities: secure valuable buildings when possible, keep spare marches collecting supplies, and use airdrop items to create favorable opportunities. This Kingshot Blizzard Brawl guide explains how the battlefield works, what to prioritize, and how to adjust your strategy based on account strength.
Blizzard Brawl is a solo real-time PvP event in Kingshot where 10 Governors compete for the highest individual Blizzard Point score. Winning fights helps, but combat is only part of the event. Buildings, supply crates, and tactical airdrop items are the main objectives, making efficient movement and objective control more important than simply attacking every opponent you see.
A successful match is usually built around three priorities: secure valuable buildings when possible, keep spare marches collecting supplies, and use airdrop items to create favorable opportunities. This Kingshot Blizzard Brawl guide explains how the battlefield works, what to prioritize, and how to adjust your strategy based on account strength.
Treat Blizzard Brawl as an objective-control event rather than a kill event. Fight when combat helps you capture or protect points, but rotate away from unproductive battles before they consume too much of the match.
How Blizzard Brawl Works
Each Blizzard Brawl match places 10 Governors into a free-for-all battlefield. A match lasts 10 minutes, including a 30-second preparation period followed by the main battle. Players earn Blizzard Points through several activities:- Occupying battlefield buildings.
- Gathering Blizzard Crates dropped by supply caravans.
- Collecting and using tactical airdrop items.
Same-Gen vs Cross-Gen Matchmaking
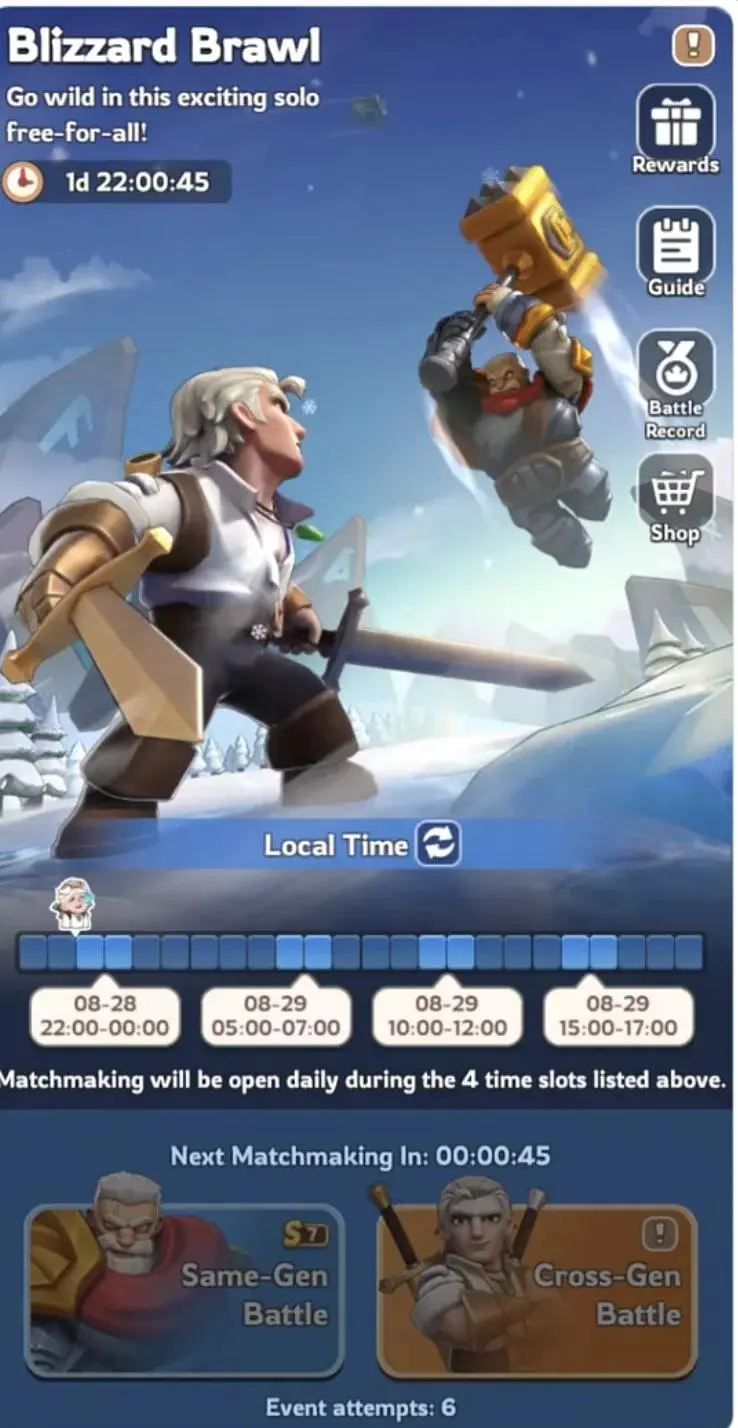 Blizzard Brawl provides two matchmaking options that affect the opponents you can encounter.
| Mode | How It Works | Best For |
|---|---|---|
| Same-Gen Battle | Limits matchmaking to players around the same generation range. | First attempts, lower-power accounts, and players learning the event. |
| Cross-Gen Battle | Uses a broader matchmaking pool that can include Governors from different generations. | Strong accounts, experienced players, or anyone testing different lobby quality. |
Blizzard Brawl Buildings and Scoring Priorities
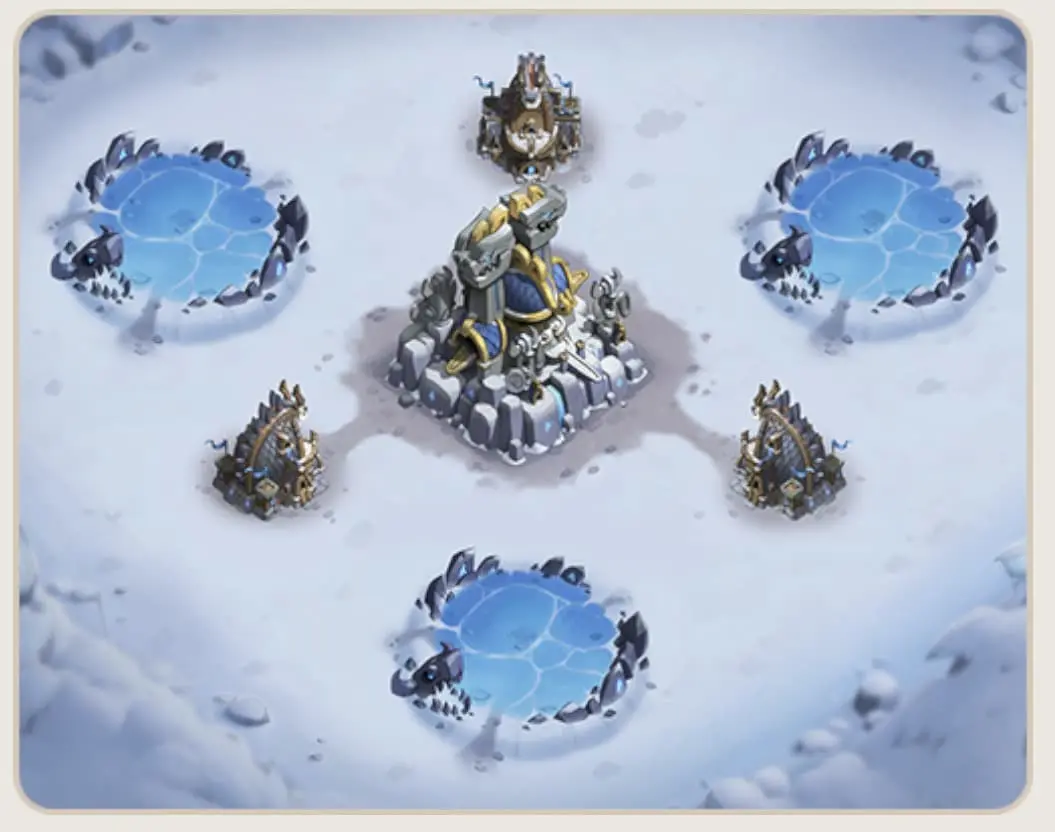 The battlefield contains four major scoring buildings: the central Vault of Valor and three surrounding Forward Camps. Capturing a building requires holding it through the capture period, after which it generates Blizzard Points while it remains under your control.
The Vault of Valor is the most important central objective, but its value also attracts the strongest competition. Forward Camps are therefore extremely useful when controlling the center becomes too expensive.
The battlefield contains four major scoring buildings: the central Vault of Valor and three surrounding Forward Camps. Capturing a building requires holding it through the capture period, after which it generates Blizzard Points while it remains under your control.
The Vault of Valor is the most important central objective, but its value also attracts the strongest competition. Forward Camps are therefore extremely useful when controlling the center becomes too expensive.
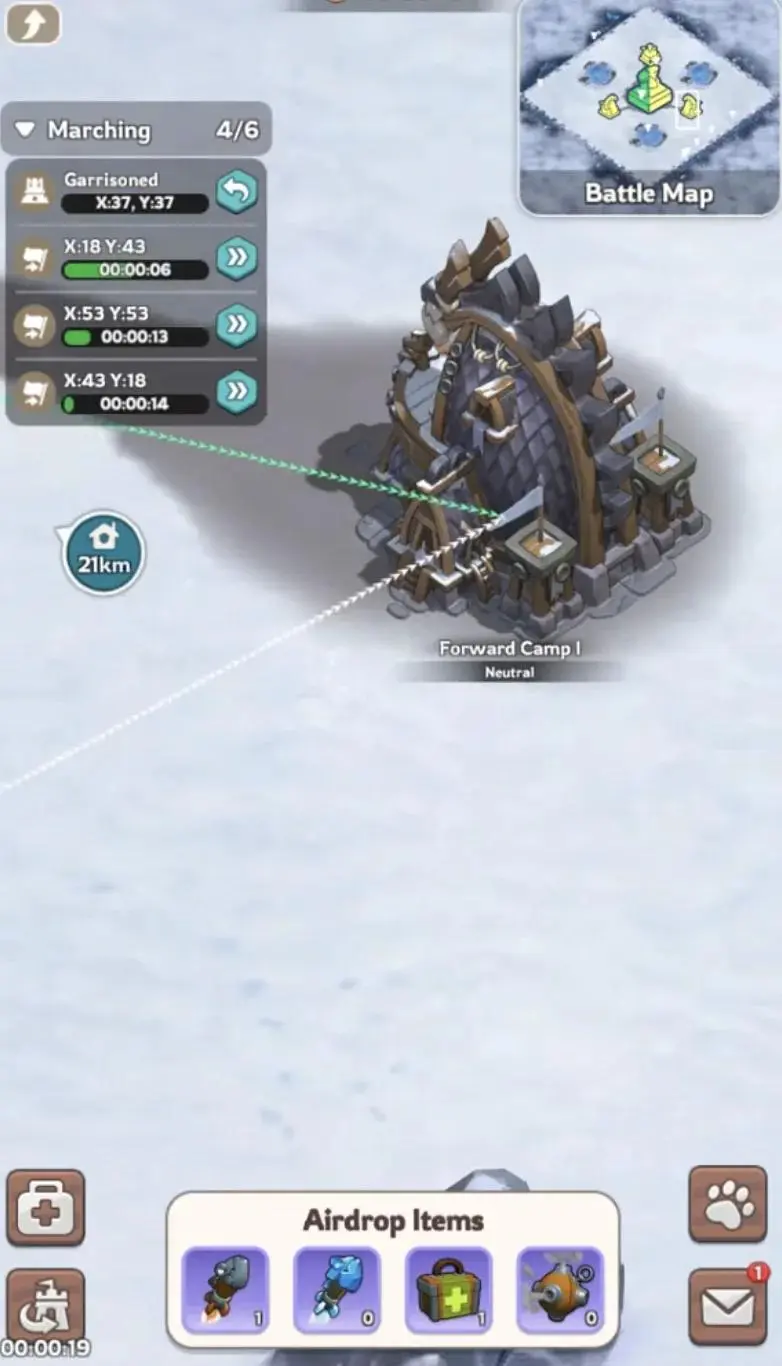
Take the Vault when you can defend it efficiently, but do not repeatedly sacrifice marches into a stronger player’s garrison. Forward Camps, supply crates, and airdrops can keep your score growing while the strongest Governors fight over the center.
Do Not Overcommit to One Building
Controlling a structure is useful only while the points justify the resources and attention required to hold it. If several stronger players begin attacking the same location, rotating elsewhere can produce a better score than continuously reinforcing a losing position. Likewise, if a strong march is sitting in a building without being challenged, consider whether another march can maintain the garrison while your best formation pressures another objective.How Supply Crates Work
Supply caravans begin entering the battlefield shortly after the battle phase starts. They periodically unload Blizzard Crates that can be gathered for additional points. These supplies are especially important for players who cannot consistently defeat the strongest accounts. While opponents fight over the Vault, a spare march collecting crates can continue generating useful score with much less direct confrontation. Watch the map rather than leaving every march permanently stationed in buildings. A flexible march can move between available crates, exposed Forward Camps, and airdrop opportunities throughout the match.Blizzard Brawl Airdrop Items
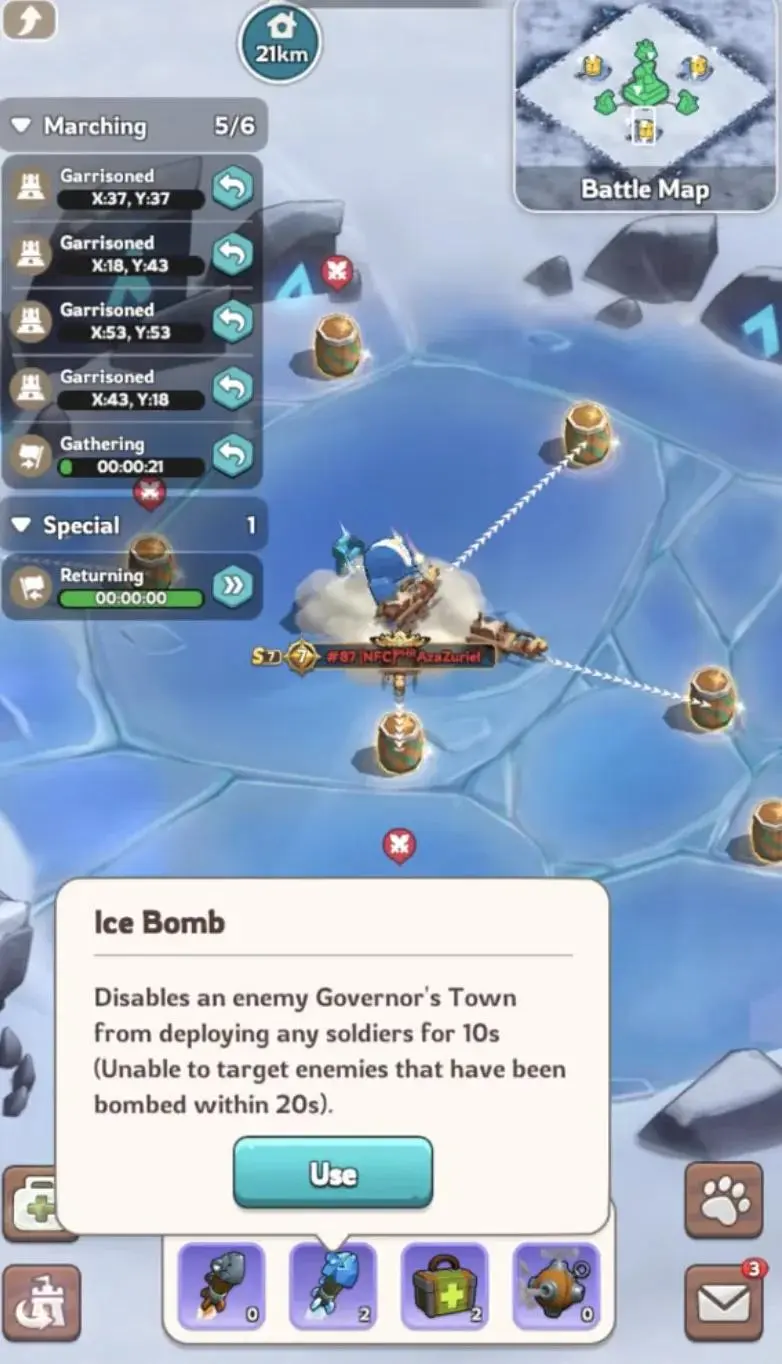 Airdrops introduce special tactical items after the battle has been underway for a short period and continue appearing during the match. Only one special collection route can gather an item at a time, and the item received is random.
Because you cannot choose which item appears, good Blizzard Brawl play requires adapting your next move to the tool you receive.
Airdrops introduce special tactical items after the battle has been underway for a short period and continue appearing during the match. Only one special collection route can gather an item at a time, and the item received is random.
Because you cannot choose which item appears, good Blizzard Brawl play requires adapting your next move to the tool you receive.
| Airdrop Item | Effect | Best Use |
|---|---|---|
| Rocket Bomb | Severely injures up to 30,000 soldiers in a targeted enemy Town or garrison. | Weakening an important building immediately before your march attacks. |
| Ice Bomb | Stops an enemy Town from deploying soldiers for 10 seconds. The target then receives a 20-second protection period from another Ice Bomb. | Preventing an opponent from reinforcing or deploying during a critical capture window. |
| Healing Elixir | Heals 30% of severely injured soldiers in the Infirmary, up to 500,000 troops. | Recovering after significant damage rather than wasting it on a lightly injured army. |
| Smoke Bomb | Conceals your Town for 20 seconds so opponents cannot select or attack it. Dispatching troops removes the effect. | Escaping concentrated pressure and creating a temporary defensive reset. |
Rocket and Ice Bomb Timing
Airdrop items become much stronger when coordinated with your marches. For example, weakening a building with a Rocket Bomb immediately before your attack gives the defender less time to recover. An Ice Bomb can temporarily stop an enemy Town from sending another march during an important capture attempt. Avoid using tactical items simply because they are available. Saving one for a meaningful fight, defensive emergency, or objective capture can provide considerably more value.Best Blizzard Brawl Match Strategy
Preparation Phase
Use the opening preparation period to inspect the lobby and identify the Governors you are likely to beat or struggle against. Your first route should depend on your relative strength rather than following the same opening every match. Before entering matchmaking, also make sure your important marches are available. Gathering, scouting, expeditions, reinforcements, and other deployments can interfere with battlefield entry. Prepare your PvP formations and equipment before queueing so you do not waste valuable match time reorganizing heroes.Opening: Capture Efficiently
At the beginning of the battle, uncontested buildings are valuable opportunities. Strong accounts can pressure the Vault of Valor immediately while additional marches target Forward Camps. Mid-power and weaker accounts should watch how aggressively the strongest players contest the center. A Forward Camp can be a much better opening if two heavy accounts are already committing everything to the Vault.Midgame: Rotate Between Objectives
The middle portion of the match is where map awareness matters most. Continue defending profitable buildings, but watch for supply caravans and incoming airdrops. A useful priority order for most Governors is:- Protect buildings that can still be defended efficiently.
- Capture open or weakened buildings.
- Collect nearby Blizzard Crates with spare marches.
- Contest airdrops when the route is practical.
- Attack enemy Governors when doing so supports one of those objectives.
Endgame: Protect Your Score
As the match approaches its final moments, objective control becomes more important than starting unnecessary fights. Reinforce structures you already own, protect valuable positions, and avoid sending important marches on attacks that will not improve your score before the timer expires. If several opponents are fighting elsewhere, an uncontested building or remaining crate may offer more practical value than joining them.Strategy Based on Your Account Strength
If You Are One of the Strongest Players
Use your combat advantage to pressure the Vault of Valor and force weaker Governors away from valuable structures. However, raw strength does not mean every march needs to remain in combat. Use additional marches for Forward Camps, supplies, and airdrop collection. If your primary building is completely uncontested, consider whether your best march can be used more aggressively elsewhere while another formation maintains control.If You Are Mid-Power
Do not fight the strongest Governor head-on for the entire match. Target Forward Camps, weakened garrisons, and objectives that become exposed when the leading players attack each other. Tactical items are particularly useful here. A well-timed Rocket or Ice Bomb can help you take a position that would be difficult to capture through ordinary combat.If You Are One of the Weakest Players
Your best path is usually activity rather than confrontation. Gather crates, collect airdrops, capture empty structures, and attack weakened objectives rather than repeatedly challenging a player you cannot realistically defeat. Even when first place is unrealistic, efficient objective play can still improve your personal event progress and reward collection.Common Blizzard Brawl Mistakes
Leaving an active match prevents you from returning to that same battlefield. Queue only when you have enough uninterrupted time to complete the match.
- Chasing kills instead of points: Combat should support objective control rather than replace it.
- Overdefending the Vault: Giving up every other scoring opportunity to fight a stronger player can destroy your final score.
- Ignoring supply crates: Spare marches should remain productive whenever possible.
- Forgetting airdrops: Tactical items can change important fights and also contribute to event progress.
- Using Healing Elixir too early: Save percentage-based healing until you have meaningful injuries.
- Using Rocket Bomb too soon: Time offensive items close to the attack they are intended to support.
- Queueing the wrong mode: Check whether you selected Same-Gen or Cross-Gen before entering.
- Refusing to rotate: Abandon a bad fight when another scoring opportunity becomes more valuable.
Blizzard Brawl Rewards and Shop
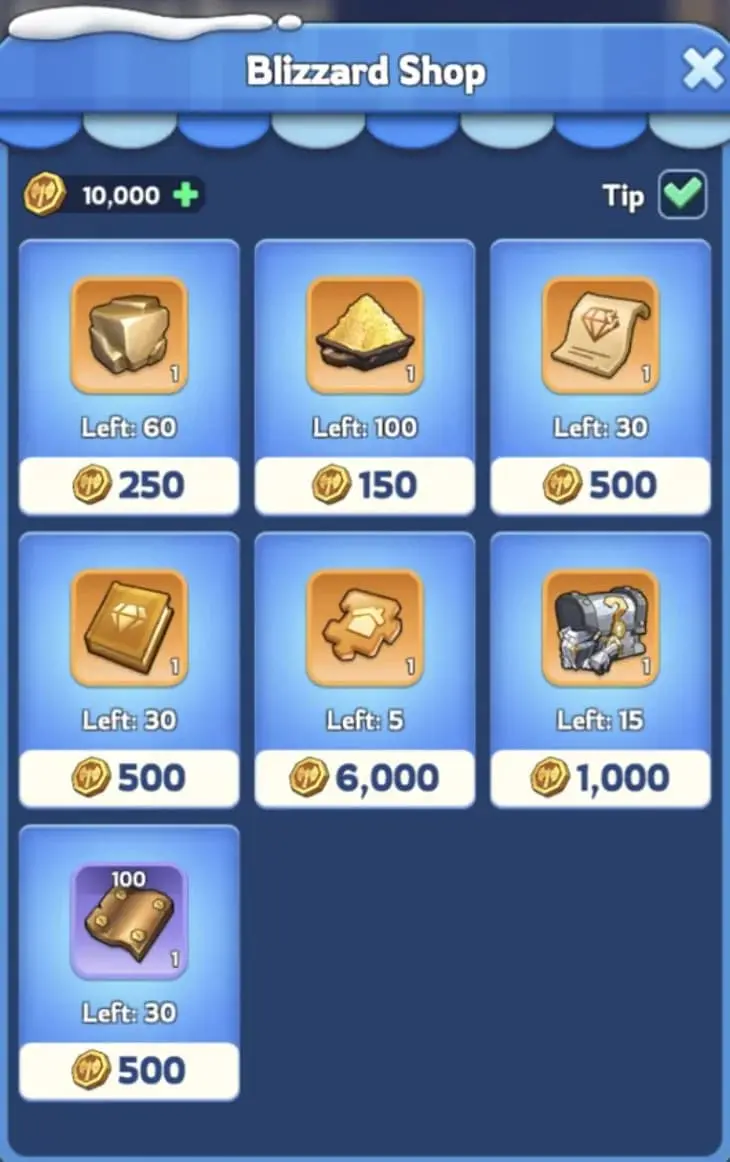 Blizzard Brawl includes event missions tied to participation and battlefield activities, while its dedicated shop uses event currency that may appear under labels such as Brawl Emblems or Blizzard Coins depending on the current event version.
Reward quantities, mission requirements, shop inventory, and the number of available attempts can change between seasons or server progression stages. For that reason, avoid building your strategy around a fixed community reward table. Check the live event screen before deciding how much effort or additional resources the current shop deserves.
When choosing shop purchases, prioritize items that address important long-term progression bottlenecks on your account instead of automatically buying convenience resources. The best purchase can change as your progression and the available shop inventory change.
Blizzard Brawl includes event missions tied to participation and battlefield activities, while its dedicated shop uses event currency that may appear under labels such as Brawl Emblems or Blizzard Coins depending on the current event version.
Reward quantities, mission requirements, shop inventory, and the number of available attempts can change between seasons or server progression stages. For that reason, avoid building your strategy around a fixed community reward table. Check the live event screen before deciding how much effort or additional resources the current shop deserves.
When choosing shop purchases, prioritize items that address important long-term progression bottlenecks on your account instead of automatically buying convenience resources. The best purchase can change as your progression and the available shop inventory change.